Quantcast
Channel: Sweeten
Viewing all 1836 articles
Browse latest View live

Domino’s New Office is “So Domino”

$
0
0

The design media brand puts the magic touch on their new workspace

office space designLiving room/reception area

A renovation and decor overhaul were naturally in the plan when stylish design magazine Domino sought out a larger office in Midtown Manhattan for their 40-person team. They called on Sweeten for a general contractor who could carve out distinct and creative areas from a light-filled but blank open space, including a reception area, a photo studio, and a kitchen camera-ready for cooking demos. A complete build-out that was outfitted with pops of wallpaper, velvet seating, and decor galore, the result was a comfortable workspace for editors and guests alike.

PROJECT: Domino moved to new offices to accommodate their growing company

LOCATION: Midtown Manhattan

RENOVATION TEAM: Sweeten general contractor

INTERVIEW WITH: Beth Brenner, Chief Revenue Officer

office space designoffice space designoffice space designOffice lunch spot and frequent photo studiooffice space design“Phone room” quiet spot

Sweeten: How did you find Sweeten and what made you want to try the service?

Beth Brenner, Domino: A few colleagues were sitting around one afternoon contemplating partners for our new office reno. We were moving into an old sewing factory so we knew that we had walls to build. Our wish list also included a photo studio and studio kitchen where we could create food and entertaining content on an ongoing basis. But what we didn’t know was how to find a contractor to work with nor how to start the project! Our marketing manager asked if I had ever heard of Sweeten and proclaimed, “They are so on-brand for us.” Five minutes later, I sent a blind email to team@sweeten.com and, before the day’s end, Sweeten’s director of communications, Kerry O’Brien, responded. Seems the enthusiasm to work together was completely mutual!

office space designConference room with magnetic organizational boardoffice space designWall-to-wall bookshelf

Sweeten: Why did Domino move offices?

Domino: We needed more space for our growing company—the best reason there is!

Sweeten: How does your new space reflect your brand?

Domino: We set out to design a creative oasis that was full of light and energy—a chic space that felt at once casual and elevated, much like the Domino brand. While the furniture itself has a modern feel, the soft pink walls and mix of accessories and art really warm up the rooms. And, for an element of surprise and delight, we installed a Missoni-wallpapered “good vibes” phone room where team members can find a few minutes of peace.

office space designOffice deskoffice space designOffice standing desk

Sweeten: What are the favorite aspects of the new space?

Domino: Because there is only one conference room, it was important that the space be flexible and that distinct areas be carved out for smaller meetings, private phone calls, and visiting guests. Various “nooks” were created where people now gather, the most notable of which are the Anthropologie-infused reception area and, of course, our beautiful new kitchen, which was designed and built by our Sweeten contractor. As in every home, it’s the primary gathering spot!

office space designFlexible workspace/reading areaoffice space designAcrylic consoles as bar area

Sweeten: What kind of work desks does everyone have?

Domino: The desks themselves are all the same—modern white tables, mint green file cabinets, and cushion-y off-white chairs from our good friends at CB2—but it’s been fun to watch everyone on the team personalize their own space. There were also many requests for standing desks, so we added two adjustable desks from BDI and placed them in a central area so everyone could rotate through.

LIVING ROOM RESOURCES: Grace Serpentine Sectional: Anthropologie. Roller shade with PowerView Motorization in Maison fabric: Hunter Douglas.

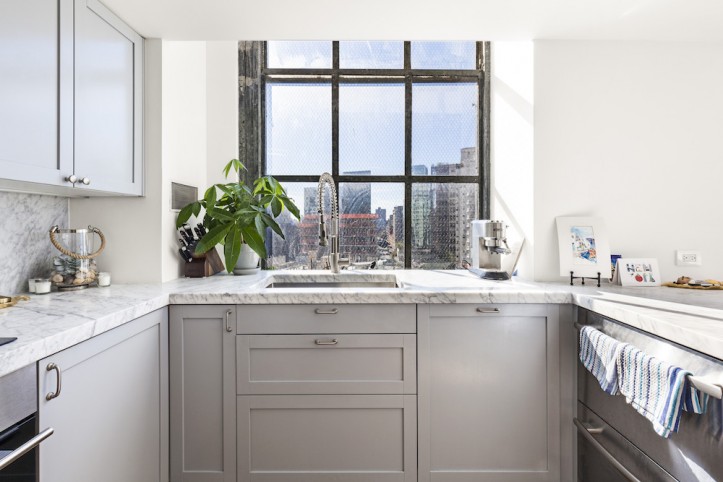
KITCHEN RESOURCES: Wainscott counter stool: CB2. Ellerbe Sconce: Schoolhouse Electric & Supply Co. 30” electric cooktop and 30” downdraft: Bosch. 24” glass door refrigerator: Bosch. 24” panel-ready dishwasher: Bosch. Calacatta Nuvo Quartz countertop: Caesarstone. Essex Faucet: Kohler. Whitehaven Sink: Kohler. Savoy Subway Tile: Crossville. In the island, steam convection oven and built-in microwave oven: Bosch.

PHONE ROOM RESOURCES: Oriental Garden wallpaper by Missoni Home: York Wallcoverings. Rachel Pink and Pure White Paint: HGTV Home by Sherwin Williams. Pyramid dining armchair by Modway: Domino.

CONFERENCE ROOM RESOURCES: Customized Foster magnetic wallboard and calendar: Visual Magnetics. Lucinda stacking chair and Orbit round chair: CB2.

BOOKSHELVES RESOURCES: Play:5: Sonos. Romance paint: HGTV Home by Sherwin Williams.

OFFICE DESK RESOURCES: Runway white desk, Rue Cambon office chair, TPS file cabinet: CB2. Kronos 6752 Lift Standing Desk: BDi.

FLEXIBLE WORKSPACE/READING AREA RESOURCES: Piazza Sofa: CB2. Moroccan Rug: Heja Home. Extra White Paint: HGTV Home by Sherwin Williams. Roller shade with Dual Roller style in Joie fabric: Hunter Douglas.

BAR AREA RESOURCES: Alissa Acrylic Console: Ballard Designs. Romance paint: HGTV Home by Sherwin Williams.

Want to bring some renovation magic to your workspace? Check out our guide on office remodeling costs.

Refer your renovating friends to Sweeten and you’ll both receive a $250 Visa gift card when they sign a contract with a Sweeten general contractor.

Sweeten handpicks the best general contractors to match each project’s location, budget, and scope, helping until project completion. Follow the blog for renovation ideas and inspiration and when you’re ready to renovate, start your renovation on Sweeten.

The post Domino’s New Office is “So Domino” appeared first on Sweeten Blog.


A Storage Swap Makes All the Difference

$
0
0

Closet and platform bed storage highlight an alcove studio

When we published Lauren’s studio renovation in October of 2016, we found ourselves obsessed with everything in it, from the thoughtful design to the clever storage sprinkled throughout. And we weren’t the only ones. The New York Times covered Lauren’s home shortly after, (see below) featuring her space in Getting Organized in a Tiny Apartment, an article focused on living small—yet smart—in the big city. Since many of you have set the goal of getting organized once and for all, we thought it was time for another look at this inspiring home.

Brooklyn Heights studioBrooklyn Heights studio

With a year left on her lease, timing was not an issue when Lauren closed on her new studio co-op in impossibly charming Brooklyn Heights. But with a desk where a master closet could be and a teeny closet where a chic workspace could be, Lauren needed some help to renovate before settling in. Read on for this first-time homeowner’s take on kitchen, bathroom, closet, and flooring updates throughout her lovely home.

Guest post by Lauren, Brooklyn Heights homeowner

When I started looking for an apartment last fall, I had no idea what to expect. I had narrowed my ideal location to Brooklyn Heights for its proximity to Manhattan and quaint feel. Once I saw the listing for this co-op apartment online, I knew it ticked all of my boxes and was ecstatic when my offer was accepted. I had time on my side as I still had about a year left on my current lease (did not think the buying process would happen as quickly as it did) and I decided the apartment could use some updates to fit my style and taste a bit more.

The space gets a lot of light and has a great view of the East River. I wanted to update the bathroom, darken the floors, and optimize storage space in the apartment. The way the previous owner had utilized storage space did not make sense to me; there was a large home office in a closet in the main living space and a small closet in the bed loft area. The bed loft also had a trap door for storage that was only accessible under the bed. I had no idea where to start looking for a contractor, but I remembered reading about an apartment renovation with Sweeten on Apartment Therapy. On a whim, I posted my project, and I waited to see what sort of responses I would get.

Brooklyn Heights studioBrooklyn Heights studioBrooklyn Heights studio

I wanted the apartment to have a clean, fresh, modern, and calm feel with optimized storage to reduce clutter. I had most of my finishes and materials selected before starting the renovation, which made everything that much easier. I got two matches initially and then worked with Sweeten to line up more so I had more bids to compare. I met with four contractors and after much deliberation, I decided to go with this Sweeten general contractor.

The one I chose completely understood my vision and desired style for the apartment. I asked him at one of our first meetings if there was anything that I hadn’t included in the scope of the renovation that I should have, and he immediately mentioned skim coating the walls and ceilings. The thought had never crossed my mind, but he pointed out the bowed beams on the ceiling and uneven surface on the walls. He educated me on why it was the best route to make this impactful update.

From the start, I knew that it would be difficult to darken the maple floors. Maple is a notoriously difficult wood to introduce stain, and I could tell from a preliminary search on Google just how hard it would be to accomplish. My contractor and his team did not back down from this challenge. They tried to go the normal route of staining first, and after the first round of testing and samples, we knew this would not give the desired result. They investigated different dyes and proper techniques for mixing the dyes and application. After some trial and error (and lots of labor), the floors turned out great!

Brooklyn Heights studioBrooklyn Heights studio
Brooklyn Heights studio

To match my floors, my contractor re-built the bed loft platform out of the same maple flooring (as it was previously just plywood). He integrated a better storage solution under the bed loft, creating three bays to store off-season clothes and a folding table and chairs for extra guests. He also installed shoe molding and base molding throughout. In the bed loft area, after removing an existing closet, he created a built-in desk nook.

Brooklyn Heights studio

In the kitchen, the existing stove was quite small at 24” and I really like to cook and wanted a standard size range. Replacing the range proved difficult as the existing cabinetry configuration did not allow for a range with 30” of width. With some creativity, my contractor came up with the solution by notching out the cabinets by a half inch on either side, shifting one cabinet down, and making it into a cookbook shelf at my request. This allowed me to get a full-size Samsung 30” gas range.

Brooklyn Heights studio

Replacing the range also meant replacing the countertops. I knew I wanted to change the existing dark marble countertops for a light-colored quartz option. I discovered that Pental Quartz Thassos was the brightest white quartz to complement the white gloss Ikea cabinets that I was leaving in place. The same material was used to make new windowsills as well.

The kitchen was also updated with a new sink, faucet, dishwasher, refrigerator, marble backsplash, and new under-cabinet lighting. My contractor came up with another great idea to add a soffit on top of the kitchen cabinets to finish off the look. The kitchen lighting was replaced, swapping out three pendants for one large lantern pendant.

Brooklyn Heights studioBrooklyn Heights studio
Brooklyn Heights studio

In the bathroom, the fact that the bathtub was too short for its location really bugged me. There also was a very odd triangular corner which I thought was a terrible waste of space. Working with my contractor, I am so pleased with how the bathroom turned out. It feels like a mini spa. He squared off the triangular corner and broke through the wall to the exterior hallway, making the triangular corner into a linen closet that’s accessible right outside the bathroom. I added a drop-in tub that fits the space better and opened it up by replacing the shower curtain with a glass shower panel. The tinted shower tile gives the otherwise all-white bathroom a refreshing pop of color. New shower lighting highlights the unique color of the tile. The fixtures are from Kohler, as is the vanity.

Brooklyn Heights studio

My contractor came up with a great idea for closets and went with larger 8-foot closet doors to make the space feel more expansive and draw your eye up to the beams. We replaced all the doors with single panel doors and simple chrome hardware. Two closets were customized by California Closets while the contractor and his team built shelving in the other two closets.

They also built a cover for the AC/heat unit in the living room, with the front panel mimicking the same style as the bathroom sink vanity. And he even took the time to come back to the apartment to mount the TV properly when a handyman I’d hired had an issue mounting it into a steel stud.

For a first-time renovator, Sweeten made the process pretty painless. My contractor takes great pride in his work, and as a client, I could not be happier with my experience working with him. Yes, there were delays (as there always are), but he was incredibly communicative and was able to handle my nerves and constant questions. He and his team are perfectionists and true craftsmen, and I could not be more pleased with their work. Everyone who comes to see the apartment sees the quality of how the tile is laid in the bathroom to how the floors are re-done, and I owe it all to my Sweeten contractor.

KITCHEN AND LIVING AREA RESOURCES: Pental Quartz countertops: Thassos. Purist sink fixtures: Kohler. Oven range: Samsung. Refridgerator: Blomberg. Dishwasher: Bosch. Lighting: Ballard Designs. Closet: California Closets.

BATHROOM RESOURCES: Vermeere ceramic wall tile in Light Ocean Breeze: Complete Tile. Purist shower and sink fixtures: Kohler. Mirror: Restoration Hardware. Wall sconces: Circa Lighting. Bath baskets and door hardware: Klaffs.

This post has been revised and updated from its original publication on October 6, 2016.

Got more style than space? Check out our favorite closet renovations and close the door on clutter.

Refer your renovating friends to Sweeten and you’ll both receive a $250 Visa gift card when they sign a contract with a Sweeten general contractor.

Sweeten handpicks the best general contractors to match each project’s location, budget, and scope, helping until project completion. Follow the blog for renovation ideas and inspiration and when you’re ready to renovate, start your renovation on Sweeten.

The post A Storage Swap Makes All the Difference appeared first on Sweeten Blog.

22 More Ways to Organize Your Home

$
0
0

Strengthen your defense against the mess

In our month-long Organizational Blitz, see how Sweeten homeowners have whipped their homes into shape.

home organization

Looking for even more tips and advice on organizing your home? You’ve come to the right place. We’ve tackled some of the most lived-in parts of your home, from the kitchen to the bathroom, and the home office to the home bar. Now, we’re taking it a step further, exploring small spaces, cabinets, closets, and washer and dryer storage. Ready to hit redo on your home’s organization? Get into it!

home organization

Don’t let square footage limit your home’s potential. These 7 ideas will empower you to live large in a small apartment.

home organization

Cabinets work in any space, not just the kitchen. Whether they’re arranged as a media center in the living room or provide extra storage in the bathroom, make the most of your cabinets with these 4 tips.

home organization

What do closets and doughnuts have in common? One is never enough. Your closets are the last line of defense against a messy home, so take inspiration from these 5 clutter-busting closets.

home organization

So you’re ready to add a washer and dryer to your home. Congrats! Now, all you have to do is find the perfect location for these appliances. Perhaps one of these 6 spots will do the trick.

Don’t miss our previous posts in the Organizational Blitz series; 21 Ways to Organize Your Home39 Ways to Organize Your Kitchen, 27 Ways to Organize Your Bathroom, Budget Basics: Kitchen Renovation Costs, and Budget Basics: Bath Renovation Costs.

Refer your renovating friends to Sweeten and you’ll both receive a $250 Visa gift card when they sign a contract with a Sweeten general contractor.

Sweeten handpicks the best general contractors to match each project’s location, budget, and scope, helping until project completion. Follow the blog for renovation ideas and inspiration and when you’re ready to renovate, start your renovation on Sweeten.

The post 22 More Ways to Organize Your Home appeared first on Sweeten Blog.

Budget Basics: Wood Flooring Costs in NYC

$
0
0

Breaking down the costs of renovating wood floors

SWEETEN_Lauren_Apartment-13

Renovating can be a big undertaking, and if your project involves an entire home, flooring is an integral piece of the puzzle that unites the space. If you’re wondering whether wood floors are a good investment, read founder + CEO of Sweeten Jean Brownhill’s advice on the topic. Here, Sweeten, a free service matching renovators with vetted general contractors, lays out factors that determine how much your flooring project will cost. Let’s examine the variables one by one.

MATERIALS AND FINISHES

Should you refinish the existing floors, or install new ones?

Many New York homes have original hardwoods that are worth reviving, but floors can reach a limit in their capacity for refinishing. If your floors have already been refinished numerous times, you might not have enough surface depth to sand down. Your GC can examine your floors and determine their thickness. If you decide your existing floors still have life in them, consider a more eco-friendly stain or finish. These new products help minimize fumes and are more environmentally-friendly. You may need to work with your contractor to ensure that you can successfully bond newer products to older floors for an even finish.

How much do you want to spend on materials?

There are endless options for flooring materials, starting at under $1 per square foot for laminate options, under $2 per square foot for engineered wood options, and under $6 per square foot for solid wood options. You can achieve the look of wood with laminate which can be installed is high traffic areas or where daily spills or dents might occur. Engineered wood, a wood veneer backed by a composite like plywood giving it stability, can perform well in environments subject to moisture like bathrooms or basements. Solid wood expands and contracts and is best in living spaces like bedrooms and living rooms. National retailers have dozens of options in these ranges and are good starting points for sorting through color and texture choices. Higher-end boutique flooring retailers offer reclaimed or bespoke hardwoods, starting at $12 per square foot.

How much should you order?

Before you finalize your order, talk to your contractor or supplier about quantity. You will probably need to order 10 percent extra to make sure that you have enough materials to cover the full square footage of your space as pieces are cut down and customized. In addition to padding your total order with extra material, don’t forget to add tax and shipping to your budget. Very inexpensive and very expensive materials ironically weigh about the same, so be prepared for approximately $2 per square foot in freight costs, regardless of whether you go for bargain or luxe floors.

Sweeten contractor Scott gave us some estimates for flooring in a 1,000 square-foot, two-bedroom apartment. If the floors do not need to be replaced, it would run you about $10,000 (at $10 per square foot) to sand and refinish the floors in a mid-range finish. For that same apartment, if you’re looking to install all new flooring, you’re looking at about $18 to $20 per square foot, which comes out to $18,000 to $20,000 for a full project using a mid-range hardwood. If you don’t need a new subfloor, the costs drop to approximately $15,000. For luxury or other expensive materials, you’re looking at $20,000 to $25,000 for the full project. These prices represent all-in budgets (including both materials and labor).

How Sweeten Works

LABOR AND RELATED PROJECT VARIABLES

Your contractor will be looking at a long list of variables to gauge the scope and complexity of your project and arrive at a total cost. As with all things renovation-related, the more complex the project, the higher the costs will run.

Most contractors will assess labor costs for a flooring project on an hourly basis or on a per-day basis. You may see wide variation in hourly rates; particularly low hourly rates (under $50 an hour) which may signal that a contractor is not insured. The requirements of individual buildings can play a significant role in dictating design and budget needs. Contractors who can afford to work in buildings with more extensive requirements tend to have higher operating costs that meet higher insurance requirements.

Refinishing floors requires fewer license and certification steps than installing floors. Many general contractors can refinish floors; those who install new floors have to go through more rigorous licensing and certification hoops. You might see a quote that sets an hourly rate of $100-$200 for each worker. Discuss rates with your contractor so that you can get a feel for what they think is needed and why.

*Will you encounter any lead paint? The minute lead paint comes into the picture, the requirements and costs change. If you are tearing up old floors that were built before lead paint restrictions were enacted, you will probably need to work with your contractor to decide whether you can safely remove and discard the debris, or whether you need to float your new floors on top of the old floors to avoid circulating lead paint dust during the project.

You have a fair amount of choice in deciding what to spend on some material aspects of a wood floor, but some basic renovation costs vary based on the level of skilled labor acquired and the location of the project, no matter what you spend on materials. Having a good handle on the real costs involved will allow you to better align your budget, avoid surprises, and get you that much closer to your dream floor.

This post has been revised and updated from its original publication on July 15, 2016.

Learn about the costs involved to renovate your kitchen and bathroom—or take a look at renovation costs per square foot.

Refer your renovating friends to Sweeten and you’ll both receive a $250 Visa gift card when they sign a contract with a Sweeten general contractor.

Sweeten handpicks the best general contractors to match each project’s location, budget, and scope, helping until project completion. Follow the blog for renovation ideas and inspiration and when you’re ready to renovate, start your renovation on Sweeten.


The post Budget Basics: Wood Flooring Costs in NYC appeared first on Sweeten Blog.

An NYC Couple Escapes to the Country

$
0
0

Finishing touches on a nearly perfect getaway

New York, bathroom renovation

Project: Add an ensuite bath to the second bedroom in Riverhead, NY

Before: Michelle and Nate, both freelance advertising creatives from Brooklyn, bought a 2,010-square-foot house in Riverhead, NY, during the summer of 2016. Built in 1994 by the previous owner, Nate found the home in good condition. “Luckily, the house didn’t NEED anything to enjoy it right away,” he said. “We looked at it as a fun long-term project to turn it into an escape from the city,” Nate said. Nestled in the woods and surrounded by local farms, wineries, and nearby beaches, the Long Island home was perfect for their plans. The first item on the to-do list was to add another bathroom.

New York, bathroom renovation

After: To make it easier to accommodate guests, the couple wanted each bedroom to have its own bath. There was a large alcove in the upstairs hallway that they thought would be the perfect ensuite guest bathroom. It was conveniently located above the downstairs bathroom and plumbing so they hoped it wouldn’t be too difficult to transform. “Our main question was really just how difficult would it be to add a bathroom where one hadn’t existed before,” said Nate. He posted the project on Sweeten and was matched with this general contractor.

We had to be out of town a lot during the work, but our contractor was really good about sending work-in-progress pictures.

New York, bathroom renovation New York, bathroom renovation

Before getting started, Michelle and Nate nailed down the look and feel of the bath, opting for a modern farmhouse vibe that was clean and simple. Because the angled roof affected one of the walls, they had to get creative with the layout, choosing to build a triangular storage nook in the uniquely-shaped space.

Shiplap was added to the slanted wall, giving the room the desired farmhouse style the couple hoped to achieve. They also incorporated some personal touches, including handmade shelves that Nate built from reclaimed wood, along with a pull-out drawer repurposed from an old door to hold cleaning supplies and extra toilet paper. For the entry, the couple took a style cue from the neighboring farms. “We especially like the look and function of the sliding barn door,” Nate said.

New York, bathroom renovation

“We had to be out of town a lot during the work but our contractor was really good about sending work in progress pictures,” he said. “The pictures helped make sure things came together the way we imagined them.”

Bonus: Michelle and Nate looked at a variety of brands to outfit their bath but always found themselves coming back to Restoration Hardware. “The nice thing about getting fixtures from one place is that you know the metals will match. Oil-rubbed bronze, for example, can look very different from one brand to the next,” said Nate.

New York, bathroom renovationNew York, bathroom renovation

Style finds: Sliding barn door: Rustica Hardware. Santa Rosa Kohler Toilet: Home Depot. Manhattan Series 6” x 24” subway tile and Ardesie “Black Reef” floor tile: Forever Floors & Design Center. Vanity, medicine cabinet, faucets, fixtures, sconces, and hooks: Restoration Hardware.

Thanks for sharing your clever new bathroom, Michelle and Nate!

An upcycled office door finds new life as the sliding door in Christine’s small bath while allowing plenty of light to shine through.

Refer your renovating friends to Sweeten and you’ll both receive a $250 Visa gift card when they sign a contract with a Sweeten general contractor.

Sweeten handpicks the best general contractors to match each project’s location, budget, and scope, helping until project completion. Follow the blog for renovation ideas and inspiration and when you’re ready to renovate, start your renovation on Sweeten.

The post An NYC Couple Escapes to the Country appeared first on Sweeten Blog.

Empty Nesters Turn a Rental into a Cozy Home

$
0
0

Downscaling translates into a more functional apartment

home renovation Manhattan

For 18 years, home for JoAnn and Brian was a 6-bedroom, 4,800-square-foot Colonial in Chesterfield, New Jersey. As they neared retirement, however, they decided that they wanted to move to Manhattan—a lifelong desire. Their daughter was living in New York City, and the couple already owned an investment property in the Turtle Bay neighborhood that could be converted to their primary residence. The apartment, a one-bedroom co-op measuring 600 square feet, had been rented out for over a decade.

SWEETEN_JoanneGalik_Kitchen-Bath-Store_Before07home renovation Manhattan

The apartment was tired and worn, and “totally not my style,” says JoAnn. “The kitchen was completely outdated and ugly. I like to cook and wanted more storage and a larger work area. I needed room for all my appliances and a large countertop for prepping. We didn’t add more appliances, though, just bought new and better-quality ones.” The kitchen was walled off from the living area and the entryway with narrowly-arched pass-throughs, which made the space feel smaller than it actually was. The plan for the bathroom, which required a refresh, was to swap out the tub for a large walk-in shower. Storage was to be incorporated throughout the home wherever possible.

home renovation ManhattanSWEETEN_JoanneGalik_Kitchen-Bath-Store20

As experienced renovators (with four renovations under their belts!), JoAnn and Brian knew it would be beneficial to hire a licensed contractor who was experienced with local rules and regulations. Since their contacts were all in New Jersey, they were at a loss for where to turn. Then, one day while they were watching the Sunday morning news, they saw a commercial for Sweeten, a free service matching renovators with vetted general contractors. “We immediately filled out the easy online form and were matched with three different contractors. After meeting our Sweeten contractor, we knew right away we wanted to work with him. This turned out to be our best decision!”

The duo got to work on a design with their contractor that would allow them to downsize comfortably from a six-bedroom house to a one-bedroom apartment (no easy feat). Their biggest concern was storage. Their Sweeten contractor redesigned the existing closets to maximize usable area and even found a place to add a new closet in the hallway adjacent to the master bedroom. To keep the apartment “simple, so it doesn’t feel too crowded,” says JoAnn, the kitchen counter stools swivel toward the living room and act as additional seating. A pull-out sofa in the living room does double duty for overnight guests.

SWEETEN_JoanneGalik_Kitchen-Bath-Store_Before09home renovation Manhattan

In the kitchen, their Sweeten contractor took all of JoAnn and Brian’s ideas and created a space with the prep surfaces they needed, while also housing their cooking tools. They chose to leave the footprint as it was, changing out everything else. Rental-grade cabinetry was replaced with custom Shaker-style cabinetry in two tones.

SWEETEN_JoanneGalik_Kitchen-Bath-Store04SWEETEN_JoanneGalik_Kitchen-Bath-Store02

Along the back wall, which holds the new Bertazzoni stove, Bosch dishwasher, and Liebherr refrigerator, the cabinetry is floor-to-ceiling white. The peninsula sports a dark wood for contrast. Both sides are topped with white Caesarstone counters. Glass subway tile backsplash and a larger-format gray tile on the floors complete the look.

SWEETEN_JoanneGalik_Kitchen-Bath-Store_Before08SWEETEN_JoanneGalik_Kitchen-Bath-Store11SWEETEN_JoanneGalik_Kitchen-Bath-Store13

In the bath, out went the old tub. In its place, their Sweeten contractor installed a walk-in shower divided from the rest of the bath with a piece of frameless glass for a more open feel. Gray mosaic tiles in complementary shapes—a hex in the shower and a weave in the rest of the room—were chosen for floors. White subway tile on the walls kept things simple, and a modern vanity provided much-needed storage.

SWEETEN_JoanneGalik_Kitchen-Bath-Store14SWEETEN_JoanneGalik_Kitchen-Bath-Store15

Next to the vanity, the contractor found room behind the wall, so he opened it up to add floor-to-ceiling built-in shelving, which JoAnn and Brian use for toiletries and small decorative objects.

The bedroom and living room were overhauled with new paint and doors. Yet another archway leading from the bedroom area to the living room was removed for more airiness overhead.

SWEETEN_JoanneGalik_Kitchen-Bath-Store19

They reported a seamless experience working with their Sweeten contractor: “We sent him many pictures of what we liked and he really paid attention,” said JoAnn. “We are extremely happy with all the choices. Their work ethic was exemplary. They showed up on time and made themselves available when we needed them. They were conscious of our budget. The contractor and his team were very respectful to our neighbors so as not to disturb anyone. They kept everything neat and orderly. Our apartment was completed in a timely fashion and exceeded our expectations!”

Thanks, JoAnn and Brian, for sharing your new Manhattan “nest” with us.

KITCHEN RESOURCES: Cala Luna floor tile: Terrazo and Marble. Kitchen custom cabinets: Interiors Palace. Bianca Drift countertops: Caesarstone. Vapor Blue glass subway tile backsplash: The Builder Depot. Sink and faucet: Grohe. Refrigerator: Liebherr. Dishwasher: Bosch. Range: Bertazzoni. Hudson Valley Massena pendant lights in satin nickel: Lighting New York. Smokey Taupe paint: Benjamin Moore.

BATH RESOURCES: Drift Weave floor tile, Drift Hex shower floor, and white subway wall tile: Tiles by Kia. Shower fixtures: Hansgrohe. 24″ Livello sink and vanity: Fresca. Carlyle II one-piece toilet: Toto. George Kovacs bath vanity light: Lamps Plus. Verdera Collection medicine cabinet: Kohler.

After a hodgepodge of DIY jobs to update their kitchen, Susan and Carl called in the professionals to give their East Village kitchen a head-to-toe makeover.

Refer your renovating friends to Sweeten and you’ll both receive a $250 Visa gift card when they sign a contract with a Sweeten general contractor.

Sweeten handpicks the best general contractors to match each project’s location, budget, and scope, helping until project completion. Follow the blog for renovation ideas and inspiration and when you’re ready to renovate, start your renovation on Sweeten.

The post Empty Nesters Turn a Rental into a Cozy Home appeared first on Sweeten Blog.

How Do Architects Renovate Their Own Homes?

$
0
0

The best-laid plans call for the right contractors

When it’s time to work on the most personal project of all—renovating your own home—more and more architects are coming to Sweeten to help them find the right general contractor (we’re flattered). Whether dealing with a tight budget or deadline, navigating a tricky insurance situation, or embarking upon long-awaited plans for their own space, architects need great contractors to fulfill their vision. Join us as we take a look at projects featuring architects who applied their own expertise to the family home.

architect contractor relationship

Cody and Marissa took down the walls surrounding their kitchen, merging it with the living room to create a multipurpose area that maximized the flow of natural light. Envisioning the kitchen as the heart of the home, Cody designed a six-foot-long island as a place for the family to gather around. He also combined a few closets in the living room into one, large closet to make better use of the space. “We felt most comfortable with our general contractor from day one,” Marissa said, “He and Cody collaborated extensively throughout the renovation, and had a clear line of communication. He did not disappoint us in any respect.”

architect contractor relationship

As an architect, Ana developed the plans for her 2-bed, 2-bath apartment and met with several contractors on her own. She was ready to hire one of the general contractors until a background check led to the shocking conclusion that their office address was an empty storefront. Rather than start a new search from scratch, Ana came to Sweeten. The renovation’s most impactful update was opening up the office/guest bedroom to connect it to the living room and installing custom sliding panels that could be used to close off the space whenever privacy was needed. Many of the professionals Ana spoke to said that the sliding panels couldn’t be done because of the oversized dimensions, which would make them too heavy, but their Sweeten contractor took on the challenge and executed them beautifully.

architect contractor relationship

Tina was eager to customize her new home (see part 1 and part 2 of her renovation), but with a fixed deadline fast approaching—the birth of her first child—she needed to act quickly. To personalize the space, she planned to open up the kitchen, re-tile bathrooms, refinish flooring, add molding/casing, and replace interior doors. “Thanks to our Sweeten contractor and his crew, the renovation process was relatively quick and painless. By having the design decisions completed before work began, we eliminated on-the-go decision-making and were able to work with the team and budget effectively,” Tina said. Her contractor was considerate of the tight timeline, and despite minor delays, the job wrapped just in time for the couple to schedule their move-in a week before the baby’s due date.

architect contractor relationship

Looking to renovate their newly-purchased fixer-upper, architect couple Kate and Arthur called upon Sweeten to enlist their team. “Arthur and I both work on very large ground-up projects and don’t regularly work with contractors on the scale of a New York apartment renovation—we needed help finding someone!” Kate said. While the contractor’s team handled the major work—installing wood floors, tiling, lighting, and appliances in the kitchen and bath, as well as removing the built-in loft in the bedroom—Kate and Arthur chose to paint and assemble the IKEA cabinets in the kitchen (a decision that Kate does NOT recommend for future renovators). The outcome was well worth the effort. “We are so happy with how the project turned out. Maybe it’s the sweat equity, but it is always very satisfying to see your design realized. We couldn’t have done it without our Sweeten contractor,” said Kate.

architect contractor relationship

After experiencing water damage in their home for the third time, Brad and Michelle needed to provide realistic estimates that could be used to challenge his insurer’s predictably low ones. Sweeten helped him find a general contractor who understood the situation completely. While the couple took a week-long vacation, their contractor got to work on gut-renovating their bathroom. Expanding storage in the bath became a challenge when they discovered that the existing glossy red IKEA cabinets had been discontinued. Taking matters into his own hands, Brad designed new ones and worked with Sweeten to find a millworker to execute his vision. Once the cabinets were ready, his Sweeten contractor took care of installation.

Want to see the renovation process broken down step by step? Check out our remodeling guides for the kitchen and bath.

Refer your renovating friends to Sweeten and you’ll both receive a $250 Visa gift card when they sign a contract with a Sweeten general contractor.

Sweeten handpicks the best general contractors to match each project’s location, budget, and scope, helping until project completion. Follow the blog for renovation ideas and inspiration and when you’re ready to renovate, start your renovation on Sweeten.

The post How Do Architects Renovate Their Own Homes? appeared first on Sweeten Blog.

The Simplest Kitchen Reno Shines

$
0
0

A rip-and-replace project delivers a much-deserved facelift

kitchen renovation Westchester

Project: Update a galley kitchen in Westchester County, NY

Before: Two decades after moving into her 1912 co-op in the town of Eastchester, Nancy felt her galley kitchen was due for a dramatic overhaul. What she craved was a brighter, more contemporary looking kitchen. True, the galley layout was functional, with plenty of room for generous-sized appliances and two vast expanses of prep space. Yet, it was precisely those long stretches of surfaces that caused the room to feel outdated. The speckled laminate countertop clashed with the original wood cabinets, while the wood floor was an awkward marriage of half oak and half pine—both with time-worn stain finishes. Anxious to get an improvement underway, she posted her project on Sweeten, a free service matching renovators with vetted general contractors, and chose her Sweeten contractor.

kitchen renovation Westchester

After: Having used the kitchen for 20 years, Nancy remained satisfied with the original cabinets and the placement of appliances. She began the renovation with the selection of a new countertop and floor that would reflect her vision of a calm, minimalist cook space. She knew she wanted Caesarstone for its durability and easy maintenance, and fell in love with a pale gray that harmonized with the stainless steel appliances that she had installed a few years earlier. Underfoot, “I always wanted a black floor,” she says. Crisp black ceramic floor tile answered her wish. The small hexagonal tile shape adds a subtle pattern while the extensive grout lines help keep the surface nonslip. New black knobs, found on Amazon for the cabinets, visually connect the pale wood with the tile and lend a touch of drama.

kitchen renovation Westchesterkitchen renovation Westchester

For the backsplash, Nancy opted for a white ceramic subway tile, keeping with the original era of the kitchen and its cabinets. A new undermount stainless steel sink and sculptural single-lever faucet with matching soap dispenser tie in with the existing appliances to underscore the sleek, simple look she was after. A coat of paint for the walls and radiator and new toe kicks under the cabinets complete the surface transformation. The result: A kitchen with a fresh outlook that’s still at home in its surroundings.

kitchen renovation Westchester

Bonus: Keeping the cabinets and appliances in place allowed Nancy to invest in the materials—countertop, floor tile—that she had her heart set on. The rip-and-replace renovation also meant minimal disruption, and the contractor finished the job exactly when he said he would.

Style finds: Countertops in Georgian Bluffs: Caesarstone. Subway tile backsplash: The Tile Shop. Cabinet hardware: Amazon. Sink and faucet: Moen.

Patricia’s kitchen turns up the brightness with a fresh coat of paint, taking the cabinets from dark wood to bright white.

Refer your renovating friends to Sweeten and you’ll both receive a $250 Visa gift card when they sign a contract with a Sweeten general contractor.

Sweeten handpicks the best general contractors to match each project’s location, budget, and scope, helping until project completion. Follow the blog for renovation ideas and inspiration and when you’re ready to renovate, start your renovation on Sweeten.

The post The Simplest Kitchen Reno Shines appeared first on Sweeten Blog.


A Greenwich Village Loft Gets a Makeover

$
0
0

A flexible, sunny space makes a happy home—and a good investment

loft renovator New York

It was brimming with potential: a corner, prewar loft on a main street in Greenwich Village. The apartment took full advantage of its southern and western exposures with oversized, industrial windows that wrapped around two sides of the loft. Much of the space was open-plan with 14-foot-high ceilings; a mezzanine above the kitchen is accessible via a charming spiral staircase and can be used as a guest bedroom or home office.

loft renovator New Yorkloft renovator New Yorkloft renovator New York

The homeowner saw an opportunity to add value to the apartment by taking advantage of its structural beauty and abundant natural light. The building was converted in the late ’70s from an industrial manufacturing space into residences and the unit had been relatively untouched since. Parquet wood tiles and warped cork would be replaced, and the decades-old kitchen and bath desperately needed a makeover. A few tweaks to the layout would also maximize the space to its full potential as an investment and a primary residence. He decided to go for it.

loft renovator New Yorkloft renovator New York

After purchasing the co-op apartment, the homeowner lived in it for six months before renovating. Modern finishes would be a more suitable backdrop to the gorgeous natural light that poured through the six oversized 10-foot windows. He also decided to use pocket and barn doors for a seamless look and flexible use of spaces. Enter Sweeten, a free service matching homeowners with vetted general contractors. The homeowner posted his project and was matched with a Sweeten design-build firm, and they got to work to fulfill the vision.

loft renovator New Yorkloft renovator New York

First, they ripped out the kitchen’s outdated Formica counters and ’70s-era cabinets, and completely gutted the old bathroom. The kitchen ceiling was cut away from the windows by about 18 inches to make more of the windows visible. An entryway closet was reduced so that the view from the kitchen window could be seen from the entrance of the apartment.

The floor on the mezzanine was also pulled back from the window and outfitted with a railing along its edge. The hardwood was repainted; the ceiling was scraped and painted, setting the stage for a guest bedroom, office, and additional closet storage.

loft renovator New Yorkloft renovator New York

The kitchen’s standout feature is the Carrara marble backsplash and 2-inch-thick countertops with a waterfall edge. Ikea cabinets with blue-gray fronts offset the white marble and are adorned with simple hardware in a satin nickel finish. On the peninsula side of the kitchen’s U-shaped counters, refrigerator and freezer drawers are tucked discreetly underneath to reduce visual clutter and maximize space efficiency. A stainless steel undermount sink is matched to an industrial faucet and sprayer.

On the side of the peninsula that faces the living room, the ledge of the counter was extended to create a space for bar seating with built-in 12-bottle wine storage as well.

loft renovator New Yorkloft renovator New Yorkloft renovator New York

In the bathroom, the homeowner chose to continue the marble theme with herringbone floors, a warm subway tile on the walls, and the same 2-inch-thick Carrara marble from the kitchen as a counter. With a frameless glass divider, the deep soaking tub does double duty for baths and showers. Three well-placed niches, including one inside the tub area, add storage for toiletries and small décor objects.

loft renovator New Yorkloft renovator New Yorkloft renovator New York

The bedroom, which benefits from one of the apartment’s enormous west-facing windows, was slightly reconfigured. The previous owners had installed floor-to-ceiling shelving with a library ladder, which was a good concept but needed to be scaled back. In its place, the Sweeten contractor built open shelving across the length of the room, keeping it within the overhead space so that it didn’t narrow the feel of the room. When its sliding doors are open, the space feeds into the living room for an open feeling. When the doors are closed, however, there is total privacy in the bedroom.

loft renovator New York

The bedroom closet, which was initially small and located inside the room, was relocated into a newly-created walk-in dressing room between the bedroom and bathroom. The homeowner wanted a closet with plenty of space on three walls for clothing and accessories. The design is perfect for couples, allowing one person to sleep peacefully while the other is getting ready for the day.

Throughout the apartment, the outdated flooring was replaced with natural white oak in 7-inch-wide planks. Sourced from Vermont, the new floorboards—long rift and quarter-sawn—show a “tigering” striped effect and are perfectly suited to the space, making a stylish first impression.

Mixing luxurious touches with economic ones, the Sweeten team was able to achieve the modern and fresh aesthetic that the homeowner imagined. What did he learn from his renovation experience? “Hire the right contractor and stay very close to the project. I feel like I made every micro decision, but it worked out! The unit looks great and I am a happy customer.”

Thank you for sharing your renewed loft with us!

KITCHEN RESOURCES: Cabinets: Ikea. Refrigerator and freezer drawers: Jenn-Air and GE Monogram. Dishwasher: Bosch. Range: Wolf. Pendant lighting: Restoration Hardware.

BATH RESOURCES: Marble subway wall tile: Home Depot. Shower fixtures and sink: Kohler. Toilet: Toto. Lighting: Restoration Hardware.

Tara and Ryan transformed a spacious loft full of charming details to create a home for their family in a former silk warehouse.

Refer your renovating friends to Sweeten and you’ll both receive a $250 Visa gift card when they sign a contract with a Sweeten general contractor.

Sweeten handpicks the best general contractors to match each project’s location, budget, and scope, helping until project completion. Follow the blog for renovation ideas and inspiration and when you’re ready to renovate, start your renovation on Sweeten.

The post A Greenwich Village Loft Gets a Makeover appeared first on Sweeten Blog.

Induction Cooktops 101

$
0
0

An affordable appliance with a lot to offer

induction cooktopCeramic glass induction cooktop from Wolf

How do you like to cook? Do you like to prepare gourmet meals? Do you entertain frequently? Are you in a hurry to get dinner on the table? If your answer is yes to any of these questions, you might want to check out one of the hottest “new” entries into home cooking today: the induction cooktop.

While this type of cooking was first introduced to the U.S. about 70 years ago, it is enjoying a surge in popularity, thanks to a couple of factors. A growing demand for this appliance has lowered prices. You can find some models for under $1,000, or as much as a third of what they once cost. The smooth cooking surface answers the demands of another trend: a sleek, uncluttered kitchen. Finally, the precision and speed of induction cooking draws Americans who are increasingly strapped for time at home and welcome the opportunity to cut even minutes from meal prep.

Sweeten, a free service matching homeowners with vetted general contractors, unpacks the many features of induction to help you better understand what’s available and noteworthy.

What is induction?

Induction is a method of producing heat for cooking. It works by creating an interaction between a metal pot or pan and an electromagnetic field below the tempered glass surface of the cooktop to heat the cookware. Induction is the only method that directly uses the cookware as a part of the cooking system.

How does induction work?

Beneath the surface—ceramic or tempered glass—of an induction cooktop rests an induction coil. When the coil is activated (by turning on its control knob or pad), an electrical current passes through this coil, creating an electromagnetic field of energy. Upon contact with that field, the iron molecules in the pan begin to vibrate. It is the friction between those molecules that heats the cookware.

The cooktop surface itself does not emit heat. Rather, heat is produced only when it is turned on and a pan makes contact with the cooktop surface. Once the pan is removed from the cooktop, the magnetic connection is broken and heat is no longer generated. Before the pan makes contact, the cooktop surface, even when it’s been turned on, will remain cool. After the pan is removed from the cooktop, the surface will be warm, but not hot to the touch.

How does induction differ from other heating sources?

Unlike gas or radiant cooktops, there is no exposed flame or coil. If you turn on an induction cooktop, it generates no heat until the appropriate cookware is placed in contact with it. Also, the heat is contained within the circumference of the pan or cooktop. As a result, less energy is generated and wasted because the heat is created only within the pan, and not in the surrounding environment.

Are there distinct benefits?

Clearly, all cooktops are not alike. While any heat source will cook food, and cook it well, induction does have standout features that include:

Safety – The heat happens in the pan, so there’s no danger of accidentally touching a hot cooktop. This is a particular benefit to homes with children or elderly family members.

Accuracy – Precision control at very low or high heat lets the cooktop maintain a temperature to melt chocolate, simmer a cream sauce, or boil pasta water.

Speed – The electromagnetic field below the glass cooktop surface quickly generates heat directly to the pan, so water boils faster—manufacturers claim a quart of water boils in less than two minutes—than with gas or radiant heat.

Energy efficiency – Heat occurs only within the pan where it makes contact with the cooktop, so there’s no energy wasted.

Easy cleaning – A smooth, continuous surface means no crannies where food can catch, and because most of the cooktop stays cool when you’re cooking, spills don’t burn on.

What else is noteworthy?

The unique cooking function—that electromagnetic field—lends itself to lots of interesting options. For instance, most manufacturers make cooktops with multiple cooking zones that can be bridged to create larger zones for, say, a roasting pan or a Dutch oven. Gaggenau’s induction cooktop makes possible the free positioning of cookware within its combined cooking areas. Thermador offers a memory feature that transfers power settings to another cooking area when the pot is relocated. BlueStar, in addition to a warming burner at 150 degrees, has a Power Boost feature—a 5,500-watt burner that claims to bring one gallon of water in a large pot to a rolling boil in only three and half minutes. Previously, induction wasn’t so good for wok cooking because the coil element couldn’t make contact with enough of the wok’s raised surface. Jenn-Air makes an induction wok module for just that purpose.

What about installation or replacement?

Induction cooktops are made to the same dimensions as comparable gas or radiant cooktops—24, 30, 36, and 48 inches. So you can replace your existing cooktop with an induction version of the same dimensions as long as you have an electrical hookup of the same voltage.

If you wish to install an induction cooktop over a wall oven, it’s best done with both appliances from the same manufacturer. However, you will want to consult with your contractor and review the installation instructions to make sure they are compatible.

Most manufacturers that make induction cooktops will also offer ranges with the induction cooktop option.

Is special cookware required?

Induction cooking requires ferromagnetic cookware or pots and pans with an iron core, which allows the transfer of energy to the pan. Your cast iron pieces and most stainless steel should work fine. Hold a magnet to the bottom of the pan; if it sticks, it will work. Glass and other non-metallic items will not, however, since they lack the iron core and will need to be replaced if you opt-in for this type of cooktop.

How about care and maintenance?

Since the unused areas of an induction cooktop remain cool while you are cooking, most spills and splatters will not cook onto the surface. The exception can be foods with sugar content, such as sauces or sweet potatoes. It’s sensible to wipe up any spills quickly with a sponge.

The smooth, continuous surface makes it easy to maintain and keep it looking new—far easier than a gas model with its contours and grates, or radiant, unless it is topped with tempered glass.

Only use a cleaner made for your cooktop. A regular glass cleaner with ammonia will mar the surface. Also, always lift a pot when you transfer it; never slide cookware, as this can scratch the cooktop.

All of these features add up to lots of choice for the home cook. With so much selection and specialization, where do you begin? When shopping for induction, ask for demonstrations. Many showrooms offer cooking classes so you can try your hand at induction cooking. After all, who doesn’t want a little romance before making a commitment?

Steam-powered cooking provides an easy way to create healthy meals.

Refer your renovating friends to Sweeten and you’ll both receive a $250 Visa gift card when they sign a contract with a Sweeten general contractor. 

Sweeten handpicks the best general contractors to match each project’s location, budget, and scope, helping until project completion. Follow the blog for renovation ideas and inspiration and when you’re ready to renovate, start your renovation on Sweeten.

The post Induction Cooktops 101 appeared first on Sweeten Blog.

5 Couples Renovate for the First Time—Together

$
0
0

When happily-ever-after meets home renovation

Whether you’re a first-time homeowner or you’ve owned a home before, taking the plunge and moving in with your partner is both thrilling and terrifying. Throw a renovation into the mix and suddenly the notion of a shared space that’s both personal and reflective of you as a couple can seem impossible—especially if you’re a first-time renovator as well. Take heart that it can be done. Read on to meet five couples who Sweeten helped to combine romance and renovation.

first-time renovatorfirst-time renovator

First-time homeowners and renovators Amy and Nick wanted to avoid a renovation at all costs. Things changed when they came across an outdated 2-bed, 1-bath condo in Prospect Heights that was just the right size and layout for them to imagine their home together. The couple moved in and started saving for a renovation. While remodeling, they refreshed the worn-out bath and tore out the triangular-shaped kitchen, replacing it with new cabinets, appliances, and a custom 10-foot-long island topped with sparkling Carrara marble. And if you’re wondering how Amy and Nick feel about the results, just ask Amy. “We use the kitchen and joint living spaces for relaxing, cooking, and entertaining. The room has all the things that make us happy.”

first-time renovatorfirst-time renovator

These homeowners spent a year dreaming about the possibilities of renovating their two-bedroom co-op in Brooklyn—their first as a couple—before they kicked things off by hiring a general contractor. Despite the many windows and breathtaking views of the city, the apartment felt crowded and closed-off. They opened up the layout by removing the wall separating the kitchen from the living room and installed an island—a feature that they had both loved from their childhood kitchens. The changes improved the overall flow and flooded the space with sunlight. Creative choices—from the bright green backsplash in the kitchen to the warm gold fixtures in the bath—allowed them to inject their personality into the space.

first-time renovatorfirst-time renovator

Joshua also dreamed of replacing the parquet. I much preferred parquet, so those conversations often ended in agreeing to disagree.

Erica and Joshua, a newly engaged couple, planned on transforming Erica’s apartment—the home she had grown to love, despite its quirks, over the past 10 years—into the perfect space to begin their new lives together. The renovation focused on opening up and updating the kitchen. “We were seeking to strike a balance between Joshua’s partiality to completely open spaces and my desire to keep some visual privacy,” says Erica. Custom cabinets replaced builder-grade cabinetry and a new peninsula provided generous storage and a place for the duo to dine. “Joshua also dreamed of replacing the parquet. I much preferred parquet so those conversations often ended in agreeing to disagree,” she said. After speaking to their contractor, “Joshua was right. The floors needed to be replaced.” The apartment is now cozy—instead of cramped—and overflowing with natural light. At the end of the renovation, Erica found that there was so much more to love about her home.

first-time renovatorfirst-time renovator

After purchasing their first home together—a two-bedroom apartment on Central Park West—Lindsay and Tim saw the potential to create their dream home. A renovation was in order to update the existing kitchen and bathrooms, as well as setting up living spaces that gave them plenty of room to work from home and entertain friends and family. By reconfiguring the layout and swapping out the old for the new, the couple was able to realize their ideal shared space.

first-time renovatorfirst-time renovator

While searching for their first home together, Cecilia was looking for a place within walking distance of shops and subway stations, while Jonathan wanted a fixer-upper with plenty of square footage. The couple combined their requirements and fed the list into a computer code that Jonathan had written to find his first apartment. The code scoured real estate websites and narrowed down the results so that they only looked at the ones that met their needs. Renovating their home led them to a unified design for the main living spaces, while also allowing them to create their own spaces where it mattered the most: in this case, his and her bathrooms.

Cecilia and Jonathan’s post was one of the most popular of the year, perhaps because they “cracked the code” for the three “R’s”: real estate, renovating and romance!

Romance meets remodeling: take a look at 5 couples who grew closer to one another while renovating.

Refer your renovating friends to Sweeten and you’ll both receive a $250 Visa gift card when they sign a contract with a Sweeten general contractor.

Sweeten handpicks the best general contractors to match each project’s location, budget, and scope, helping until project completion. Follow the blog for renovation ideas and inspiration and when you’re ready to renovate, start your renovation on Sweeten.

The post 5 Couples Renovate for the First Time—Together appeared first on Sweeten Blog.

Converting a Basement into a Living Space

$
0
0

Here’s what you need to know to elevate your lower level

basement contractors
Cristiana’s spacious basement for lounging and laundry

Flipping your dark (and maybe damp) basement into an actual living space can add a lot of square footage, not to mention value, to your home.

Almost all existing basements have a good shot at turning into a play area, media room, or even another bedroom and bathroom. Several factors, such as current ceiling height, local egress regulations, and insulation needs will influence how long your timeline will be and what it will cost.

The good news is on average roughly 70 percent of what you put into your basement renovation will be recouped in the value added to your property, according to REMODELING’S 2017 Cost vs. Value report. The median budget of a basement renovation in the U.S. for 2017 was about $70,000. Sweeten contractors have done projects for far less (and also far more).

There are also no deal breakers according to our Sweeten contractors. Any problem—bad plumbing, lack of natural light, high humidity, a low ceiling—can all be sorted to make your basement happen. It will all depend on how much you are willing to pay. “It’s a balancing act to how much you want to put into the house before you exceed what value it brings,” said Alan, a Sweeten contractor. “You also have to decide if cost value is important to you or is it more important to have a home you want to live in.”

Here, Sweeten, a free service matching homeowners with vetted general contractors, outlines what you need to consider when sketching out a vision for a basement remodel:

Ceiling height

While building regulations vary from town to town, Sweeten contractors say the height requirement for the ceiling will be between six and seven feet. About 50 percent of basement jobs require the floor to be dug lower to allow for additional ceiling height, according to Kareem, a Sweeten contractor in Philadelphia. (He would know since he is 6′ 6″ tall.) This involves cracking open the existing concrete floor, which is usually one to two inches thick, removing the excess dirt and re-laying the concrete.

Second form of egress

If you envision more of a living space than a laundry and storage area, a second exit will likely be necessary. “To be comfortable and have no problems with building inspectors, you will need that second form of egress, such as a window or a door with steps leading outside to ground level,” said Kyle, a Sweeten contractor. That usually means digging down to make an open passageway on one side of the building so there is a way to get in and out.

Plumbing

Often, homeowners will add a half or a full bath to their new basement space. The plumbing for this likely goes under the concrete flooring. This will help avoid flooding if any of the pipes burst, according to Kareem. As your future basement living space will probably be below the sewer lines, a pump will be required to get waste out, said Kyle. Of course, adding a bathroom will also add to the budget, but for many, the convenience is worth it, he said.

Size

How much square feet you will be able to add to your basement is another factor to consider when it comes to the cost and value it adds to your house. The smallest basement renovation Kyle worked on only added 400 square feet of living space with the owners using it as a kids’ play area. The typical size of a basement space is about 1,000 square feet, he said. And don’t forget, if you have equipment such as your home’s boiler in the basement, a mechanical room could take away a few hundred square feet from the livable space.

Waterproofing and insulation

Basements are known to be damp and account for the majority of your home’s indoor moisture, according to Alan, another Sweeten contractor. On top of the general humidity in your basement, flooding could also be an issue, so pay attention when it rains next. “Rain and leaks tend to be a big source of water issues that you don’t have to deal with in the rest of the house,” said Alan.

The answer to this common problem is often insulation and waterproofing. And there are intelligent products that can help. If a conversion involves a bedroom, which is a room where many hours are spent, it is ultra important to keep toxic mold at bay, which is fed by moisture. In-wall products like CertainTeed’s MemBrain is an accessory to regular insulation that allows the buildup of moisture to escape while preventing moisture from entering in the first place. Its 2-step process will add a few extra days to a renovation timeline. Their SMARTBATT requires a shorter installation process for spaces like a rec room, which you likely won’t spend as much time in as a bedroom. As a one-step insulator, it blocks moisture from entering when it senses humidity at a low level in its cavity.

Even with these intelligent products, insulation requires multiple products and systems to stay on top of heat, cold, and humidity, according to Ted, a representative from CertainTeed. This could mean using spray foam to fill in cracks and seal windows and doors, as well as typical insulation products.

Ventilation

To prevent toxic mold, the humidity of living spaces should be below 60 percent, according to the Environmental Protection Agency. That’s why ventilation, along with insulation, is important. Relying on natural air flow from windows is possible, but its subject to the weather and seasons. Extending your home’s existing HVAC system will help ventilate the basement area, said Kareem. However, the ideal situation is to remove the humidity. He suggested exhaust fans installed into the wall or window that push damp air out while circulating the remaining air around the entire house. This system can either turn on when the lights are switched on or be equipped with sensors that switch the fans on once humidity gets above a certain level. A humidifier could also be used, but be prepared to pump that waste water up to the sewer lines.

Renovating your basement might be the easiest way to add another floor of living space to your home. Like any home construction project, there’s much to consider. But in the end, your home will increase in value and your quality of life (think noisy kids with their own playroom, or your noisy friends around a home bar with football on the big-screen TV) will improve.

If you have the extra square footage of a basement, why not add a laundry room down there?

Refer your renovating friends to Sweeten and you’ll both receive a $250 Visa gift card when they sign a contract with a Sweeten general contractor. 

Sweeten handpicks the best general contractors to match each project’s location, budget, and scope, helping until project completion. Follow the blog for renovation ideas and inspiration and when you’re ready to renovate, start your renovation on Sweeten.

The post Converting a Basement into a Living Space appeared first on Sweeten Blog.

A Moody Bath for a Getaway Home

$
0
0

A Long Island bath goes classic yet modern

general contractor Suffolk County

Project: Redesign the first-floor bath in Riverhead, NY

Before: Brooklyn couple Nate and Michelle bought their 2,010-square-foot-house in Riverhead, NY, as a rural getaway. The home was perfect in many ways, but the bathrooms left a lot to be desired. After building an ensuite bath for the upstairs guest bedroom with Sweeten, the couple’s attention turned to the downstairs bath. The plan was to design a bathroom that fit with the farmhouse style of the home while having its own, distinct personality. Nate posted the project on Sweeten and was matched with this general contractor.

general contractor Suffolk County

While the upstairs bath was being built above the one below, the rooms were not perfectly aligned…the contractor had to figure out the best way to run pipes.

After: First thing to go? The outdated pink floor. Inspired by a photo online of a bathroom with blue walls and a white pedestal sink, Nate and Michelle made it their color scheme. To make it their own, they chose a vanity with plenty of storage and added brass fixtures and hardware for tonal contrast. The combo of moody blue, warm brass, and bright white subway tile makes the space feel fresh and modern.

general contractor Suffolk County

During the renovation, one bathroom was being built above the other, and the rooms were not perfectly aligned. The contractor had to figure out the best way to run pipes from the downstairs space to the new bathroom upstairs. “The solution was to create a tray ceiling [in the downstairs bath] so the pipes could be concealed around the perimeter of the wall,” Nate said. “Even though the pipes are only along one wall, the tray ceiling makes it look like a nice design decision rather than an extra shape on one side built to hide something.”

general contractor Suffolk County

His advice for future renovators? “Make sure you have all the pieces before starting. That includes the tile, fixtures, vanities, toilets, and even the little things like towel hooks and toilet paper holders. That way, your project isn’t held up while waiting for some piece to come in.” A smart suggestion for keeping the project on time and running smoothly.

general contractor Suffolk County

Bonus: Nate modified a set of store-bought shelves to better suit the space. “The brass shelf is from CB2. It actually comes as a set of three in different sizes designed to hang together,” he said. “We only wanted one, but the whole set was cheaper than most of the other single brass shelves we found, so we got it anyway. Maybe we’ll find a spot for the other two.”

Style finds: Napoli 4” x 8” subway tile (shower walls) and Re-Use in Sand Matte floor tile (including shower floor): Forever Floors & Design Center. Fixtures, hardware, 20th C. Filament Bare Bulb sconces, sink, and Pharmacy Powder vanity: Restoration Hardware. Santa Rosa Kohler Toilet: Home Depot. Brass shelf: CB2. Gentleman’s Gray paint: Benjamin Moore.

Looking to create a unique bath, Erin and Brian took an antique basin table and transformed it into a sink pedestal.

Refer your renovating friends to Sweeten and you’ll both receive a $250 Visa gift card when they sign a contract with a Sweeten general contractor.

Sweeten handpicks the best general contractors to match each project’s location, budget, and scope, helping until project completion. Follow the blog for renovation ideas and inspiration and when you’re ready to renovate, start your renovation on Sweeten.

The post A Moody Bath for a Getaway Home appeared first on Sweeten Blog.

A Studio Co-op Renovated for Two

$
0
0

A long-distance relationship blooms, from start to reno punch list

Kim and Ian were both far from home when a chance encounter in Spain brought them together. When the couple decided to close the distance between them—10,000 miles!—they found a studio apartment on Manhattan’s Upper West Side. The previous tenant had lived in the home for nearly half a century, and during a walk-through, Kim and Ian discovered that the original plumbing and wiring were in need of an overhaul. Challenges aside, the space was just the right size for the two of them and full of good vibes—not to mention a fortuitous discovery in one of the walls. Ready to make it their home, the couple embraced a gut renovation of the entire apartment. Read on for Ian’s take on their remodeling journey.

studio renovationGuest blog post by Upper West Side homeowner Ian

The story begins in northern Spain along the Camino de Santiago, where an aging Aussie trial lawyer met and fell in love with a not-so-aging American nurse who just happened to be working in Manhattan and living in Bayonne, New Jersey. Many cross-Pacific flights later, plans were made for a wedding in Hawaii and the purchase of an apartment somewhere on the Upper West Side of Manhattan, where we could live together when I was able to escape court commitments in Sydney. With both of us having been married before with adult children, there was no need for a large apartment, but there was a definite need for the best use of a small space.

studio renovationSweeten homeowners Kim and Ianstudio renovationstudio renovation

The search for an affordable apartment was challenging to say the least. But thanks to the StreetEasy website and FaceTime (for my wife in Bayonne and myself in Sydney), a studio apartment in a 1915 co-op was located and purchased. The 450-square-foot space was previously owned by a retired nun who had lived in it for some 45 years (long enough ago to remember John and Yoko walking down the street from the Dakota apartments). The old girl (the apartment!) required a total renovation but had a good vibe about it.

studio renovationstudio renovation(During) Laying down pipe for the islandstudio renovation

Given that I am from Sydney and my wife is from Bayonne, locating a suitable contractor was also challenging. After much Googling, I located the Sweeten website and was immediately fascinated by the Sweeten concept. So much so, that more out of interest than any real expectation, I posted a quick job description on the website and a hopeful (very hopeful!) budget.

With hindsight, I understated the renovation work required to a significant extent. While awaiting responses from Sweeten, I also contacted contractors I had identified from various magazines and other websites. Immediate ballpark quotes of $150k upwards from these folks sent shivers through my bones. Then interviews with potential contractors were arranged by Sweeten with the search ending in a coin toss between the two final contractors. After deciding on the Sweeten contractor, who won out largely because he was both a qualified architect and builder, the renovating process began. The detailed quoted price was more than reasonable and way under $150k quoted by others.

studio renovation(Right) Hidden window discoveredstudio renovationstudio renovationstudio renovation

I suppose it’s axiomatic that the design stage of any renovation is not ideal when one of the players lives mainly overseas. But as luck would have it, a trial in Sydney collapsed and I was able to fly to New York for a thorough “walk through” with my wife Kim and our contractor after the building contract was signed. I had two absolute requirements—a new soaking tub and new solid oak flooring throughout. Kim also had absolute requirements: a nice cooking area and island, and new everything else! After weeks of to-and-froing, preparing and amending the plans, work was ready to commence!

It’s no exaggeration to say that what was required was, in effect, a gut renovation of the whole apartment. Laying new oak flooring was going to require the removal of two layers of old parquetry flooring. Hidden in the wall adjacent to the neighboring building (a contemporary high-rise) were two old large windows from a time when the building next door was an old brownstone. Our contractor’s eyes lit up at the sight, explaining how he could remove the windows and use the cavity space for storage cabinets and counter space, both considered premiums in NYC studio apartments. I am a lover of wood, and the contractor proposed the cabinets and doors be made of American walnut and mahogany veneer. The final look and function of both pieces of furniture—a matching clothes cabinet hangs at the foot of the bed—are terrific and make excellent use of an otherwise wasted wall.

studio renovationstudio renovation

Plans for the main space involved splitting the studio into a cooking/dining/working area and a living/sleeping area. With the kitchen island as the primary divider, the plans were fine-tuned, including a design for a reconfigured bathroom. To be effective, a complete rewiring and re-plumbing of the whole apartment was required. This also involved breaking into the ceiling of the apartment below ours to put in new pipes and ball joints as required by the co-op management. Our Sweeten contractor did all the arranging with the downstairs apartment owner and diplomatically handled inevitable noise complaints. The guts were ripped out of the apartment and walls replaced.

studio renovationstudio renovationstudio renovation

The price quoted by the contractor to do the building work did not include the appliances, bath fixtures and other items such as tile, lighting, and flooring. We made use of various websites and sourced mainly high-end products, all of which when installed look fabulous and add value to the overall project. The sourcing and purchasing of items over the Internet was a real boon, seamlessly saving both shoe leather and thousands of dollars in cost.

Timing became an issue. Our contractor’s hope at the outset was for the project to be completed within three to four months. But with the unforeseen need for the gut renovation, including rewiring and re-plumbing, the project did blow out substantially in timing. Waiting for the soaking tub (Kaldewei) to come from Germany, the kitchen feature light (Vistosi) to come from Italy, and the kitchen faucet (Franke) to come from Switzerland also prolonged the completion date by months. Luckily, we both had other homes in which to live while the work took place. Now that the work’s done, the angst with the delay seems trivial.

studio renovationstudio renovationstudio renovation

We finally moved into the apartment in early December 2017 when I arrived from Sydney for an extended stay with Kim in New York. Living here has been terrific. And I’ve put the tub to good use throughout the very cold winter! The layout, feel, and livability of the apartment has exceeded my expectations. We’ve had some teething issues with bits and pieces (cracked tile, cabinetry needing adjusting, painting touch-ups) but our contractor has been most attentive to fixing any problem that has arisen. I must say though, as a Sydney-sider, the street noise in NYC coming into the apartment is a bit louder than I had expected. But as one of Kim’s friends said to me, “Soak it up mate, it’s all part of the New York experience.” Let the good times continue!

Thank you, Kim and Ian, for sharing your renovation journey with us.

KITCHEN RESOURCES: Cabinets: Custom. Hardware: Lowe’s. Steel Gray granite countertops: Quartz Master. Navy Blue Towne backsplash tile: Nemo Tile. 20” stainless steel sink: Franke. Faucet: Franke. Refrigerator: GE. Cooktop: Bertazzoni. Stove: Bosch. Range hood: Proline Range Hoods. Overhead lighting: Vistosi. Norman Counter Stools: Inmod.

BATHROOM RESOURCES: White Pulse Pop wall tile and Volcano Nero Natural floor tile: Nemo Tile. Sink vanity: Luxier. Faucet: Isenberg. Fixtures: Hansgrohe. Soaker tub (55″ x 29″ x 19″): Kaldewei. Toilet: Toto. Lighting: Lowe’s. 42” Medicine cabinet: Kohler.

Frans and Dalal transformed their Gramercy studio into a flexible living space with movable walls and custom storage.

Refer your renovating friends to Sweeten and you’ll both receive a $250 Visa gift card when they sign a contract with a Sweeten general contractor. 

Sweeten handpicks the best general contractors to match each project’s location, budget, and scope, helping until project completion. Follow the blog for renovation ideas and inspiration and when you’re ready to renovate, start your renovation on Sweeten.

The post A Studio Co-op Renovated for Two appeared first on Sweeten Blog.

At Home with Herringbone Patterns

$
0
0

This eye-catching design is having a moment

Its familiar broken zigzag is something you’ve probably seen before in a tweed suit or jacket, calling to mind the likes of Sherlock Holmes and Chanel. From fashion to home design, this elegant pattern—expressed in a range of materials—makes a big impact. Below, eight homeowners make herringbone their own.

herringboneherringbone

A peek of oak herringbone underneath old carpeting inspired Kasey to restore the original floors in his prewar apartment. During his renovation, he discovered that the floors were in near perfect condition. A light touch-up was all that was needed to return them to their former glory.

herringbone

Nazli and Larry splurged on herringbone walnut floors in the kitchen and downstairs parlor, which quickly became one of their favorite features in the townhouse. The pattern, combined with the warmth of the stain, adds plenty of interest and texture.

Looking for something more durable than wood, Allison and Jovito chose a porcelain tile with imitation grain to give the appearance of polished white oak. Their contractor laid the tile in a herringbone pattern to punch up the muted tones of the kitchen.

Wanting some “wow” in the kitchen, Alicia and Ed decided that subway tile was firmly off limits. Instead, the couple chose cream-colored marble laid in a herringbone pattern for a touch of warmth.

To inject some color into his all-white kitchen, Gall chose a gold-toned herringbone backsplash comprised of glass and marble tile. The combination of different materials and colors provides a refreshing update on a classic design.

herringbone

Inspired by the clean, elegant look of hotel bathrooms, Lauren and Ross covered every inch of their master bath in marble. For the floor, they chose a white herringbone tile and paired it with fine lines of gray grout for some subtle contrast.

herringbone

Ana and Leo amped up the drama in their modern guest bathroom with herringbone mosaic tile in shades of gray. The addition is the perfect complement to the minimal design.

herringbone

With an all-white theme in mind, Cecilia and Jonathan wanted to keep things bright and shiny in their full bath. A slight deviation from the plan inspired an accent wall of veined marble subway tile laid in a herringbone pattern.

Step out of the ordinary and add some color to your kitchen.

Refer your renovating friends to Sweeten and you’ll both receive a $250 Visa gift card when they sign a contract with a Sweeten general contractor.

Sweeten handpicks the best general contractors to match each project’s location, budget, and scope, helping until project completion. Follow the blog for renovation ideas and inspiration and when you’re ready to renovate, start your renovation on Sweeten.

The post At Home with Herringbone Patterns appeared first on Sweeten Blog.


A Dark Bathroom Goes Hollywood-Glam

$
0
0

Exposed bulbs and graphic tile create an unforgettable look

Chelsea bathroom renovation

Project: Update and brighten a small bathroom in a Chelsea studio

Before: The bathroom tub, fixtures, and drain in this circa 1964 co-op had done their job, but were now way past their sell-by date. “The shower and tub had gotten a little scary,” says Kristen, the homeowner of this 700-square-foot studio. Peeling paint on the tub and set-in hard water stains on the tiles didn’t help matters. Plus, the windowless room was dark, with floor-to-ceiling slate tile and inadequate lighting. And there was no medicine cabinet or built-in storage.

Chelsea bathroom renovationChelsea bathroom renovation

After: Knowing that she wanted the bathroom to be bright and modern with classic elements and storage, Kristen posted her project on Sweeten and was matched with a general contractor. Because of building regulations, she wasn’t able to reconfigure the plumbing, so the work was solely cosmetic. Flash forward to the finished room…now, the crisp, light lavender-gray walls and tub paired with the black-and-white floor tile, white- and gray-veined porcelain shower, and Hollywood-glam mirror lighting brighten up the bathroom considerably. “I’m glad I chose porcelain over marble because it requires less upkeep,” said Kristen. She decided to pass on installing a vanity, the absence of which adds to the illusion of more space—as does the stripe pattern on the floor tiles. A free-standing cabinet is part storage and part display. The overall feel of the space hits the modern yet classic style she was looking for.

Chelsea bathroom renovationChelsea bathroom renovationChelsea bathroom renovation

Finding all those items that could work together was Kristen’s biggest challenge. It was difficult, she said, narrowing down selections, “considering the many options out there,” though her contractor, “provided a lot of information to help make decisions.” In addition to supplying a Renovation Checklist, Sweeten’s client services assisted Kristen with a list of products and materials to order for her project. “I checked off each item once I had sourced it. This was really helpful because there are some things I never would have thought of, like a new vent for the wall,” Kristen said.

Having an organized list also allowed her contractor to make sure it was all compatible with the space. Sweeten, she said, “helped incorporate eco-friendly elements into my renovation, telling me what to look for in a toilet, showerhead, and faucet.”

Bonus: Her other challenge was that she was traveling during the renovation. But her contractor took care of any bumps, even going directly to the manufacturer when there was an issue with a showerhead. At one point, she said, while she was at the airport waiting for a flight, the Sweeten contractor’s tile installer called with a layout question. “Luckily, this airport had a lot of tile,” she said with a laugh. “So I walked around and looked for different layouts to help reinforce my decision.” Who needs subway tile when airport tile offers loftier inspiration?

Style finds: Floor tile: Cement Tile Shop. Battiscopa Renaissance Calacatta porcelain wall tile: AKDO. Shower and sink fixtures: Brizo. Pedestal sink: Signature Hardware. Toilet: Toto. Lighting: Illuminate Vintage via Etsy. Hutch: Target. Medicine cabinet: Robern. Art: Neue Galerie.

Chelsea bathroom renovationChelsea bathroom renovationChelsea bathroom renovationChelsea bathroom renovation

Marissa created a glamorous bath with high-contrast design, combining black walls with gleaming tile and a sparkling chandelier.

Refer your renovating friends to Sweeten and you’ll both receive a $250 Visa gift card when they sign a contract with a Sweeten general contractor.

Sweeten handpicks the best general contractors to match each project’s location, budget, and scope, helping until project completion. Follow the blog for renovation ideas and inspiration and when you’re ready to renovate, start your renovation on Sweeten.

The post A Dark Bathroom Goes Hollywood-Glam appeared first on Sweeten Blog.

Two New Baths Top Off a Remodel Odyssey

$
0
0

Finally, a happy home after bumps and delays

For a dozen years, Tara and Mike lived in a tiny studio apartment on the Upper West Side. A move uptown, to the Grand Concourse Historic District of the Bronx, landed them in a much larger home in a 1930s co-op building. In 2015, they moved in and up against no deadlines to renovate, carefully thought through the changes they wanted to make and assembled photos and information that a contractor could use to bring their visions to life. Read on for the full story of how they gutted two full baths, enlarged closets (one of which now fits three bikes!), and lived to tell the tale of not one, but two, plumbing disasters.

renovator Bronx
Guest post by Bronx homeowner Tara

We purchased this apartment a few years ago, after living in a 250-square-foot apartment on the West Side for about 12 years. Going from a studio apartment to a 3-bed, 2-bath was a big leap. The kitchen had already been renovated by the previous owners, so we only had to deal with the outdated bathrooms. Leaky toilets, hot water surges, and ugly yellow tile were just a few of the things we needed to remedy.

We took our time in the beginning, even before posting our project to Sweeten, to lay out exactly what we wanted room by room. We had a document with photos ready to hand to any contractor who we contacted. This made it easy for us and the contractor to make sure we were all on the same page from the start. We were also never in a rush to start the work. We started looking for a contractor at least four months before we were even ready to think about putting any money down. This gave us the luxury of taking our time to choose the firm that was right for us.

renovator Bronx
(Before) Master bathrenovator Bronx
(Above) Master bath

We ended up going with this Sweeten design-build firm. We wanted a design-build firm from the start so that someone would take charge of sourcing and delivery of all the various components of our job. Our budget included line items for everything we could possibly need, and we were free to select the fixtures that fit within the budget. When something we wanted was out of range, we either decided to find an alternative or paid the difference upfront. We also needed someone who could handle all of the Department of Buildings permits, as well as our co-op’s application process.

We had a specific vision for this renovation. We planned to gut the bathrooms and add ceiling fans in all of the bedrooms and living room, new radiator covers in the bedrooms, and lighting and doors throughout. The bathroom in the master was very narrow, and we wanted to move the tub out of the guest bath and into the master. Moving the location of the tub, and expanding the bathroom by about two feet, solved the narrowness issue.

renovator Bronx
(During) Master bath ceiling reveals a waste line wrapped in duct taperenovator Bronx

We really were excited to pick out all the new fixtures and tiles for the bathrooms. Our contractor offered several options within our budget. We wanted to see and touch the cabinets and faucets before committing to them. Our thinking was if we’re going to be living with these things for years to come, we needed to like how they felt, and more importantly, wanted to see the quality.

We visited several showrooms in the NYC area to see the Kohler line of cabinets and the Brizo faucets that we ultimately chose. We liked the Fantini sink faucet and shape of the handles for the guest bath; it also matched the black finish of the Brizo line used in the shower. To keep the ordering simple, we used the same family of fixtures and cabinets in both bathrooms, with different finishes for each.

We chose a fun feature as an accent in the shower: a round tile in shades of white, blue, and green from a company called Clayhaus in Oregon. Our biggest challenge was timing the special order and delivery around the completion of the first bathroom. The tiles took about six weeks to fabricate, and we ended up being about two weeks off. Luckily, the crew had other projects around our apartment to complete while waiting for the tile to arrive.

renovator Bronx
(Before) Guest bathrenovator Bronx
(After) Guest bathrenovator Bronx

When our master bath ceiling was opened up during demolition, the contractor found that the waste line from the toilet above had been wrapped in duct tape during a prior renovation. We immediately reported this to building management, who arranged to have the pipe replaced. Their plumber worked with our contractor to gain access, and within a day the situation was resolved.

renovator Bronxrenovator Bronx

Enlarging the master bath with extra square footage resulted in an added benefit, giving us space in our bedroom to accommodate a large dresser next to the newly combined closets. In the guest room, we widened the closet to make it suitable for bike storage. We can now get three bikes in there with room for other gear along the sides and floor.

renovator Bronx
(Before) Master bedroom closetsSWEETEN_TaraDowd_Apt08

During the renovation, we had no options for moving off-site, but having a contractor who understood our needs, and the fact that we would be living on site the entire time, made the process bearable. The first few weeks of disruption were the hardest, but we settled into a routine and focused on the outcome. And because we were dealing with two bathrooms, we could only start the second one when the first was completed.

renovator BronxSWEETEN_TaraDowd_Apt12renovator Bronx

While our own renovation went smoothly, with all pipes and fittings replaced and brought up to code, it was an external problem that delayed the final weeks of work. Nearing what would have been the end of the project, we came home to water pouring down from a bathtub located in the apartment two floors above us. An older pipe leading from the tub drain had eroded completely and detached from the waste line. Bath water had been spilling down for hours while we were at work. Our crew was not on site that day, and the unit above ours was vacant. With no one to report the leak, it was ours to deal with.

That was the most devastating moment because we were so close to completion but now had to deal with the clean-up and dry-out of brand new walls and flooring. We put in a claim with our insurance carrier to cover the cost of the repairs, and wanted our team to do the work, since they were still on site, knew our building and our home. We could trust them to work unsupervised. They were willing to stick around and do this repair, but it was at least three months and multiple visits by an insurance adjuster before we could agree on a scope of work and monetary settlement. Luckily, both bathrooms were still usable and we made sure there was no mold growing between the walls. When all was said and done, both spaces were finished about ten months after the start date.

Prior to the start of the renovation, our biggest question was whether we would be able to find a reliable contractor. We would be trusting them with our home, our valuables, and our dog, for several months, day in and day out, while we were at work. We wondered if they would do the best job they were capable of, or would they cut corners? Would they stand by their work?

I’m happy to say that they went above and beyond our expectations, standing by us when we had a major leak that damaged a significant portion of their work. They also took excellent care of our home. Sweeten was a great resource, and knowing that they were there to assist us was valuable when going into a major renovation. I don’t think we would have had as easy of a time finding a solid and reliable contractor if we had not used Sweeten from the start.

Thanks, Tara and Mike, for sharing your renovation story! 

MASTER BATH RESOURCES: Basketweave floor tile; gray subway wall tile: Classic Tile. Assorted Circle accent tiles: Clayhaus. Jason Wu shower/bath fixtures: Brizo. Jute sink/vanity: Kohler. Verdera medicine cabinet: Kohler. Toilet: Toto.

GUEST BATH RESOURCES: Basketweave floor tile; white subway wall tile: Classic Tile. Assorted Circle accent tiles: Clayhaus. Jason Wu shower/bath fixtures: Brizo.  Verdera medicine cabinet: Kohler. Sink/vanity: Fantini. Toilet: Toto.

OTHER RESOURCES: Interior Doors: Dykes Lumber. Haiku ceiling fans: Big Ass Fans.

What’s the difference between design-build firms and build-only firms? Read all about design-build firms, which combine design and construction under one roof, in our guide.

Refer your renovating friends to Sweeten and you’ll both receive a $250 Visa gift card when they sign a contract with a Sweeten general contractor.

Sweeten handpicks the best general contractors to match each project’s location, budget, and scope, helping until project completion. Follow the blog for renovation ideas and inspiration and when you’re ready to renovate, start your renovation on Sweeten.

The post Two New Baths Top Off a Remodel Odyssey appeared first on Sweeten Blog.

Building Your Outdoor Deck

$
0
0

Pros and cons of materials for your outdoor living room

deck cost
Michelle and Nate’s deck renovation in Greenpoint, Brooklyn

Serving as either an open gathering place or a cozy retreat, the deck has become a widespread alternative to the patio and even the front porch. This growth in popularity is due in large part to new developments in decking materials. You have a range of types to choose from, for both durability and versatility of application. The result: you can have a deck that is a true outdoor room, whatever its size and shape.

Sweeten, a free service matching renovating homeowners with vetted general contractors, offers a rundown of deck materials and their features to familiarize you with the many choices available.

Getting started

No matter how you design it or gussy it up with planters and pergolas, at its essence the deck is a large outdoor surface. Typically, it is connected to the house, at grade or raised from the ground, either by a few inches or several feet, depending on its placement. (A patio is made of stone or concrete and set into the earth.) Though made from moisture-resistant or repellent material, the deck should not touch the ground, so supports are necessary. The boards come in specially milled or manufactured sizes that are typically 2-by-4s, though widths can vary from a given manufacturer to provide you with more design options. Look for rounded edges that resist splintering.

You will find many choices for joining systems. This is partially for aesthetic reasons—to hide the joints or screws—if that’s important to you, to allow expansion and contraction. Some boards are fastened with regular deck screws; others have channels or slots along the long edges for less noticeable fastening systems. “Decking boards with slotted sides can be installed using a clip system, so you do not have to surface fasten the boards,” says Doug L. Mucher, Senior Marketing Manager for CertainTeed. “This provides a cleaner installation.” Staggered patterns will hide seams more effectively than aligned patterns.

Deck supports are best installed by an experienced contractor who knows the local codes and zoning laws, to ensure it is in compliance. Some cities or counties require approval from the planning commission and inspections during the building process. This might limit your grand plans, so be sure to consult first with your contractor before proceeding. “Most homeowners can handle replacing the deck surface,” says Mucher. “However, if the project requires the deck substructure to be built as well, you’ll most likely want to hire a contractor. A contractor can be required to make sure it is built to code.”

Your choice of material will be driven by your lifestyle, taste, and also environment. Ask yourself: will it see frequent, cooking, dining, entertaining, and lounging in the sun? Most materials are fabricated to withstand nearly all types of climates and weather, but some require more upkeep than others to stay in good shape and appearance.

deck cost
Nel’s roof deck renovation in Philadelphia

Types of deck material

Once upon a time, wood was your only choice. If you like this classic material, you can still have it and enjoy its good performance, with a few regular, precautionary measures. There are some synthetic alternatives, too. Consider the following:

Pressure-Treated Pine Hardwood

PRO: As the term indicates, pressure-treated hardwood is denser than regular woods, making it more resistant to insects and to splitting, swelling, and rot from humidity. Easy to paint, stain, and finish, it is the thriftiest option, so it’s good for homeowners on a strict budget.

CON: It is a natural material and requires frequent maintenance to assure top performance. Pine is not as hard as other popular deck options—cedar or redwood. As with all real wood, it can splinter. Upkeep includes deep cleaning and application of a lumber preservative annually as well as occasional sanding. Ask your contractor about environmentally friendly stains and sealants.

COST: From $1.50 per square foot.

SWEETEN_Marsha_and_Adam_Townhouse-16
Marsha and Adam’s townhouse deck in Brooklyn’s Bedford and Stuyvesant neighborhood

Wood

PRO: There’s a reason why many synthetic decking materials simulate the look of wood. There is nothing like this natural material for its warmth and expression of quality. The most popular species are cedar and redwood, for their durability. Natural tannins and oils resist insects well, and these woods are easy to stain, paint, and seal.

CON: Even hardwoods are not as hard as plastics. Wood can dent, split, splinter, fade, and require frequent upkeep to maintain the best appearance and life. You will need to not only wash with a wood cleaner or pressure-washer, but also seal it at least once annually. Best to sweep daily or weekly to avoid damage from gritty dirt. Darker shades will heat up in sunlight, making them unpleasant underfoot in the summer when you are likely to spend the most time there.

COST: From $4 per square foot for cedar; from $6 per square foot for redwood.

Composite

PRO: Made from wood fibers and recycled plastics or PVC (polyvinyl chloride), composite and other synthetic decking is touted as near maintenance-free. It will not warp, splinter, or rot, and it repels insects. It requires no stain or sealing and offers plenty of selection for wood looks and colors. It also can be molded and so lends itself to curved shapes. It requires little care except cleaning with soapy water and a soft bristle brush.

CON: Surfaces in darker colors can become hot in the sun and may fade over time. It can melt if exposed to high heat for a time, such as from a grill. Scratches can’t be buffed out and dropped greasy foods will stain it.

COST: From $5 per square foot.

PVC

PRO: Also know as polyvinyl chloride, PVC is a thermoplastic that can be shaped and formed into a variety of products including decking. A particularly hard plastic, it won’t scratch, warp, rot, split, or stain; it’s lightweight and easy to install and requires no annual treatments other than cleaning with soap and water.

CON: More limited palette than composite. Will not break down in a landfill.

COST: From $4 per square foot.

Vinyl

PRO: Lightweight vinyl is comprised of PVC and polyethylene. Available in faux-wood styles and textures, this material is easy to install thanks to its light weight and ease of slicing with a saw. It never needs painting, resists staining and fading, and won’t heat up, unlike natural wood and some composites. Easy to clean with soap and water.

CON: Over time, it may sag. Non-biodegradable if you decide to chuck it.

COST: From $3 per square foot.

deck cost
Elevated deck by Trex

Make it your own

Once you’ve narrowed down your choice of material, you can think about ways to customize the deck. “With all the styles and colors available, homeowners are really only limited by their imagination,” says Mucher.

Create a unique deck in a variety of simple or elaborate ways:

  • Mix different colors or shades of planks
  • Combine different plank widths
  • Run planks in different directions to create a pattern, like a herringbone or a fan
  • Add a contrasting border
  • Paint on a stenciled motif

deck costCustomize with a chiminea; deck by CertainTeed.

Make the deck resemble an actual room:

  • Create steps and two or more levels for different activities, such as relaxing, dining, taking in the view
  • Install an outdoor kitchen, chiminea (freestanding, front-loading fireplace or oven), or spa
  • Incorporate a pergola or a lanai
  • Include lighting, for use at night or to highlight an area

Finally, most decks, particularly those that are raised or tiered, include a railing. You can match your deck material or choose a complementary style or finish. Work with your contractor to make sure all the necessary elements are incorporated, for safety and security as well as environment and maintenance.

As with any room for your home, you want your deck to be comfortable and dependable, a space you enjoy looking at, relaxing in, and sharing with family and guests. Invest time in planning and selecting the right material for your lifestyle, and when it’s complete, enjoy this (nearly) carefree space.

If you have an outdoor space that you use for grilling or gathering with friends, consider installing an outdoor kitchen.

Refer your renovating friends to Sweeten and you’ll both receive a $250 Visa gift card when they sign a contract with a Sweeten general contractor.

Sweeten handpicks the best general contractors to match each project’s location, budget, and scope, helping until project completion. Follow the blog for renovation ideas and inspiration and when you’re ready to renovate, start your renovation on Sweeten.

The post Building Your Outdoor Deck appeared first on Sweeten Blog.

Transom Windows Let the Light In

$
0
0

A classic architectural detail that’s always in style

Sunlight is an essential ingredient in home design. Before electricity, windows played a much bigger role in our lives than simply displaying a pretty view. To improve the flow of natural light, transom windows were invented and installed above doorways. Nowadays, we can enter a dark, windowless room and flick on a light switch, but while artificial light makes things easier, it fails in comparison to the warmth of sunlight and the mood-boosting benefits of serotonin it gives us. Below, five Sweeten homeowners turn up the brightness in their own homes (and soak up more vitamin D) with transom windows.

transom windows

Converting a bathroom into an office gave Larry the space he’d always wanted, but closing the door sealed off a lot of natural light. To remedy the issue, transom windows were installed above the doorways leading into his office.

transom windows

Meredith took space from the downstairs bath to create a pantry. The window that had once belonged to the bathroom was transferred along with the square footage. In order to make sure that the new powder room had enough light, a transom window was built into the wall to allow light to flow through from the original window.

transom window

In need of a second bedroom for their growing family, a dining nook off the kitchen presented Chris and Amber with the perfect solution. Building the new room resulted in the kitchen losing its only window. To make the small bedroom feel bigger, a transom window was placed along the top of the doorway. The placement of the window also meant that the kitchen would receive a steady stream of natural light.

transom windows

Sarah and Michael’s kitchen had lots of charm, but heavy wood cabinets and trim made the space feel dark and cramped. Not wanting to diminish the room’s character, the cabinets got a splash of white paint while doors and trim were left intact. The white paint boosts the overall brightness of the space and allows the original transom windows to shine as statement pieces.

transom windowstransom windows

With a looming deadline (a baby on the way!) to turn their one-bedroom into a two-bedroom, Idalee and Danny got to work on reconfiguring their living space. They carved out a second bedroom between the kitchen and the living room, sealing off a window in the process. Not wanting to lose any of the natural light coming through, transom windows were added to the new space, one on the wall shared with the kitchen, another on the wall next to the living room.

Deeksha and Joe made a wall out of windows to provide some privacy for their guest room and home office without sacrificing the light from a nearby window.

Refer your renovating friends to Sweeten and you’ll both receive a $250 Visa gift card when they sign a contract with a Sweeten general contractor.

Sweeten handpicks the best general contractors to match each project’s location, budget, and scope, helping until project completion. Follow the blog for renovation ideas and inspiration and when you’re ready to renovate, start your renovation on Sweeten.

The post Transom Windows Let the Light In appeared first on Sweeten Blog.

A Kitchen Shows Off Its Dazzling Side

$
0
0

Once relegated to a single wall, a true working kitchen comes to life

Photos: Kyle Knodell

Project: Update and enlarge a small kitchen in downtown Brooklyn

Before: Looking for more square footage in downtown Brooklyn led this couple to a 3-bedroom, 2-bath 1,230-square-foot loft in a 1920s Art Deco building. The kitchen was an unusual shape, with all of the appliances huddled together along one wall, not so suitable for avid entertainers.

kitchen renovation, BrooklynSWEETEN_Sarah_Firshein_Beforekitchen renovation, Brooklyn

After: To expand the space, the couple wanted an L-shaped layout with a six-foot-long island and floor-to-ceiling cabinets for storage. They posted their project on Sweeten, a free service matching renovators with vetted general contractors, and chose their Sweeten contractor. Condo approvals were a lengthy process due to the building’s landmark status and paper-thin walls, but once they were complete, the renovation itself took two months. Their contractor encouraged them to keep cooking as a focus, meaning no TV in the kitchen and leaving the “binge-fests for the den.” The couple eagerly agreed on a modern look mixing closed cabinets and open shelves while pairing white and gray shaker-style cabinets with custom black walnut slabs. One of the black walnut slabs acts as a desktop in a built-in—a workspace ideal for the husband, who is usually up before dawn checking email.

kitchen renovation, Brooklyn

You could agonize over the exact CMYK breakdown in your grout, or you could choose one that’s a reasonable shade of gray, order it online, and get on with it.

A white subway tile backsplash with dark gray grout and white quartz counters serve as a simple backdrop, while brass hardware adds a modern touch. To splurge on Caesarstone countertops, known for their durability, the couple passed on a farmhouse sink, which the husband had been dreaming about, for a more affordable stainless steel one. Durability was a priority for the couple. “This kitchen was built to be used,” said the homeowner. With its greatly increased prep space and extended bar seating, we couldn’t agree more!

kitchen renovation, Brooklynkitchen renovation, Brooklyn

Bonus: After hosting their first dinner party in the space, she received a thank-you from a friend who said, “I could spend all my days in that kitchen.” The hostess’ response: “And that’s exactly our plan.”

Style finds: Cabinets: Fabuwood. Brass cabinet hardware: Semihandmade. Subway tile: Home Depot. Statuario Maximus countertop: Caesarstone. Custom black walnut slabs (open shelves, island countertop, desktop): 3 Dot Design. Light pendants: AllModern.com. Refrigerator: LG. Dishwasher: Bosch. Profile microwave: GE. Profile range: GE. Faucet: Delta. Chair (at desk) and Slope counter stools: West Elm.

Love the floor-to-ceiling cabinets with a built-in workspace? Take a look at our cost guide on custom built-ins and create your own.

Sweeten handpicks the best general contractors to match each project’s location, budget, and scope, helping until project completion. Follow the blog for renovation ideas and inspiration and when you’re ready to renovate, start your renovation on Sweeten.

The post A Kitchen Shows Off Its Dazzling Side appeared first on Sweeten Blog.

Viewing all 1836 articles
Browse latest View live