Living space and rental come together in Brooklyn
Bellamy, an executive at The GAP, and Zak, a senior environmental scientist, had their hearts set on a Brooklyn brownstone. Although it was a lengthy process, (made more complex by the fact that it was an estate sale), the pair found themselves the proud owners of a two-family, 2,400-square-foot Bedford-Stuyvesant brownstone in 2017. They posted their project to Sweeten, a free service that matches homeowners with vetted general contractors, and got to work.
One of the major changes they made was to flip the way the house would be used. Previously, there was a lower duplex and a top floor rental apartment. Bellamy and Zak wanted to reverse it so that the top two floors could be used as the owners’ duplex, with a garden rental. The plan was to salvage any original details while giving the home a fresh update.
Here is the renovation story of the couple’s main home. The journey for their garden-level rental is coming soon—but get a sneak peek of the results at the bottom of the post.

Guest post by Bed-Stuy homeowner Bellamy
After a grueling year-long search, countless open houses, and one house lost in a bidding war, we found our home. Remarkably, it had everything we wanted: it was a two-family home in the heart of “brownstone” Brooklyn, with original hardwood floors. Most of the houses in the neighborhood were built circa 1900. Many we viewed did not stand the test of time, but this home had been in the same family for years and did not show the usual wear-and-tear of a 100-year-old home. We were lucky, but it did need a major facelift.


(Above) Floor plans for first and second floors
I was thankful to stumble upon Sweeten early in my renovation research. While I had owned a home before, this was our first time doing a serious renovation that would require more than our DIY skills could handle. I posted our project on the site and chose this contractor.
The layout of the house and our budget did not afford us a ton of options, so the renovation was straightforward. We focused on structural changes to change the flow and use of the house. Thankfully, when we moved in, we were able to live in the garden floor apartment while we renovated the upper two floors where we would eventually live.
![SWEETEN Bellamy Grindl Townhouse-1stFloor_Before09]()


(Above) First-floor entryway
We removed the original entry doors as you come into the entry foyer, but left the structural wall intact. This allowed the area to feel more open as you continue into the living area; it also gave back more livable space to work with. However, I loved the original details of the doors and was determined to find another use for them. Luckily, they just fit the ceiling clearance on the second floor and they found new life as the guest room headboard.


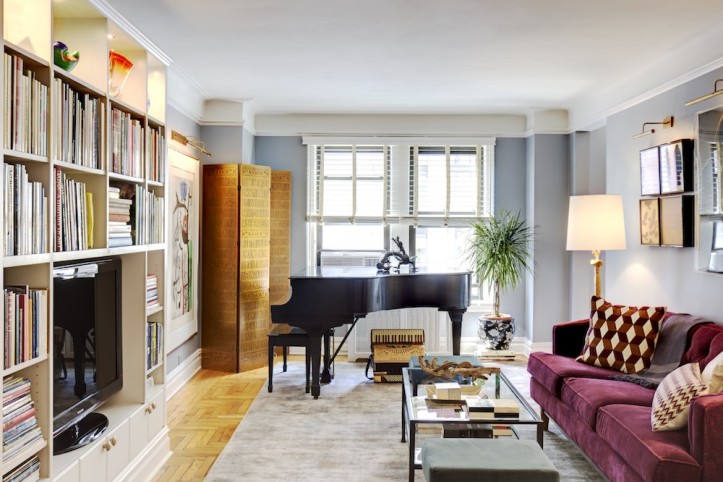
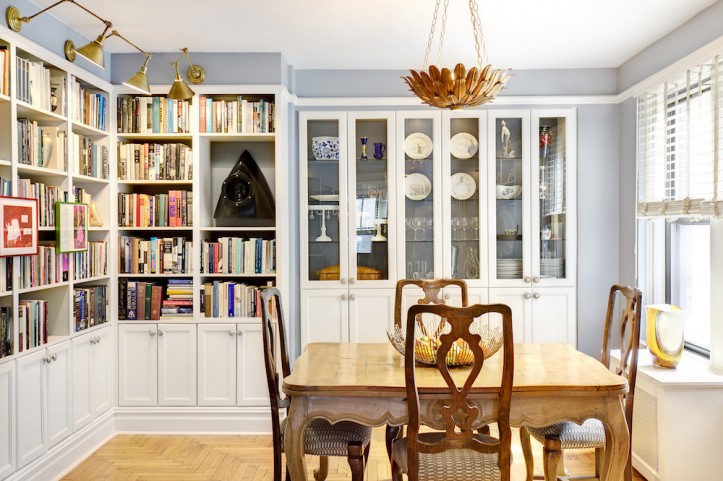
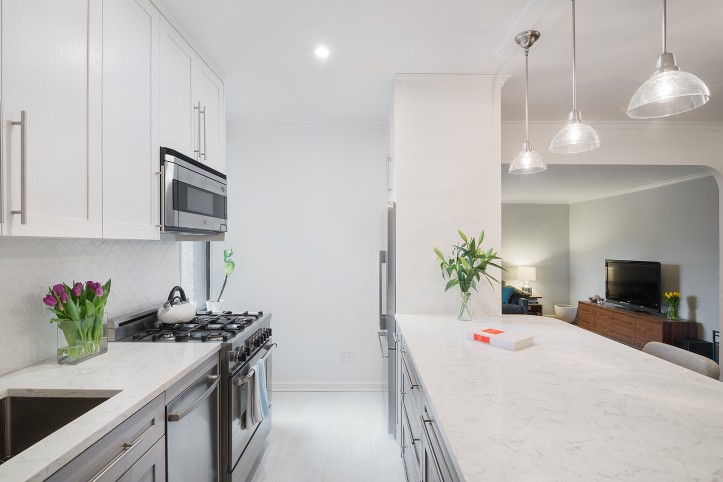
(Above) First-floor living space
In the living room and through to the kitchen, we tore down two walls and exposed a long expanse of brick wall. The former owner had repointed the brick in the front room with black mortar, which was a real eyesore. When we exposed the whole length of the house, we were left with two walls that didn’t match. Limited by our budget, we repointed the half that was previously covered and had to get creative with the other side. Eventually, we experimented with painting techniques to blend the two together.


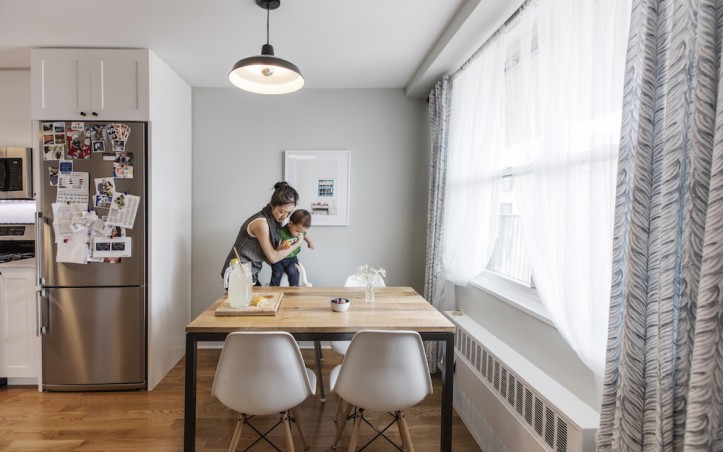
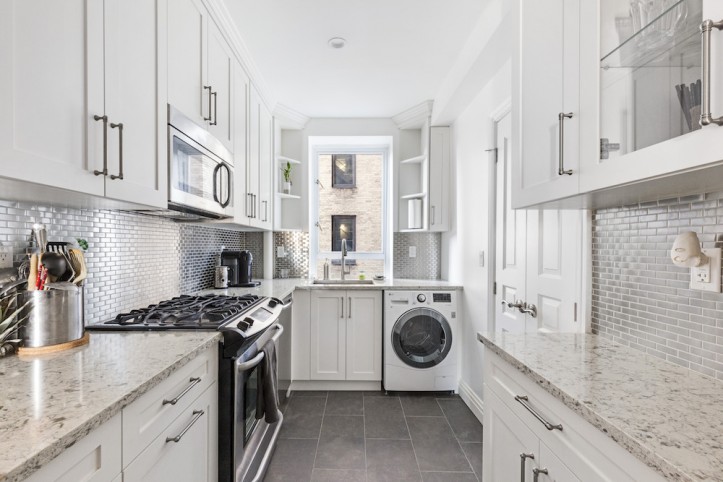
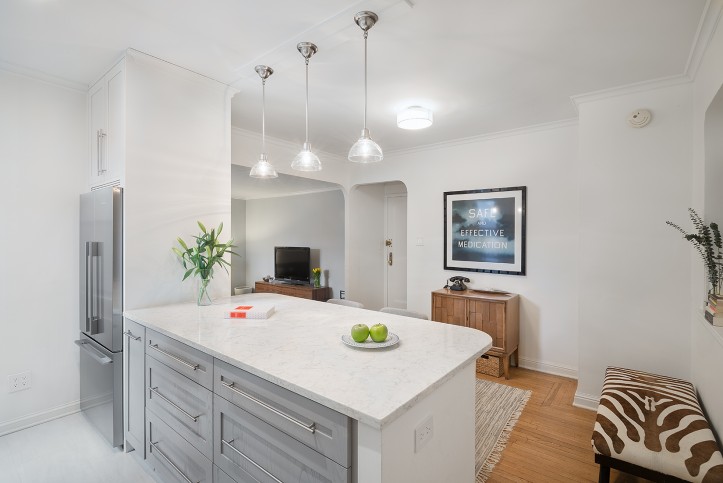
(Above) First-floor kitchen
I wanted the kitchen to be the focus of the home and pored over the details. There were three main obstacles: adding a door for backyard access, the ceiling height, and a non-negotiable double oven. I initially wanted to enlarge the back window above the sink to make it a focal point and let in more natural light. Not far along into the process, I had to abandon that idea since we were concerned with what the enlarged opening would do to the structural integrity of the home, given its age. It was also a huge expense so we chose to use those dollars elsewhere. In the end, we actually made the window above the sink slightly smaller to allow for a proper backsplash. We replaced the second window with a door and added a small landing and stairs for easy backyard access.


The next question was how to vent the hood with 11-foot high ceilings and open shelving left nowhere to hide. Ultimately, the ducting was kept exposed and vented directly through the wall outside. I love the industrial element it adds to the newly renovated space.
Lastly, where to fit the double oven? At first, I was concerned I would be giving up valuable pantry space, but the layout worked out perfectly and there was room for everything we wanted, even the custom built-in taps. We are home-brewing enthusiasts and wanted a unique feature in our kitchen to showcase that. While this was a first for our contractor, he approached it with humor and completed the installation. There’s also easy access to change it out and connect to cold-brewed coffee or wine when we are entertaining.

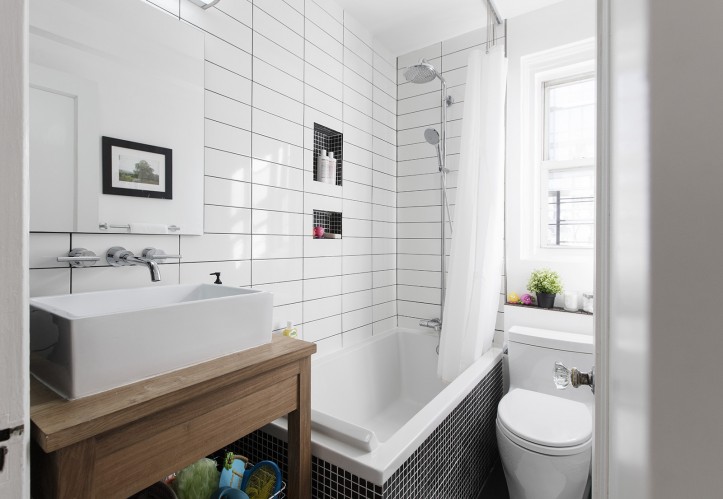
(Above) First-floor bath
The first-floor bath was an easy update. The layout was already functional, so we kept it as-is with a direct replacement—aka rip-and-replace—of all the fixtures. We were able to salvage the original door and reuse the existing tub. We later put our DIY skills to the test and added fun wallpaper and wainscoting.
My favorite splurge on the top floor was a heated bathroom floor—worth every penny in the winter.


(Above) Second-floor master bedroom and closet
The top floor previously served as a separate apartment complete with its own kitchen. We wanted to have a master bedroom, master closet, master bathroom, guest bedroom, and laundry room. The tricky part was figuring out where to put everything. The pre-existing kitchen allowed us to easily add laundry without a huge expense. Once that was decided, everything else fell into place.


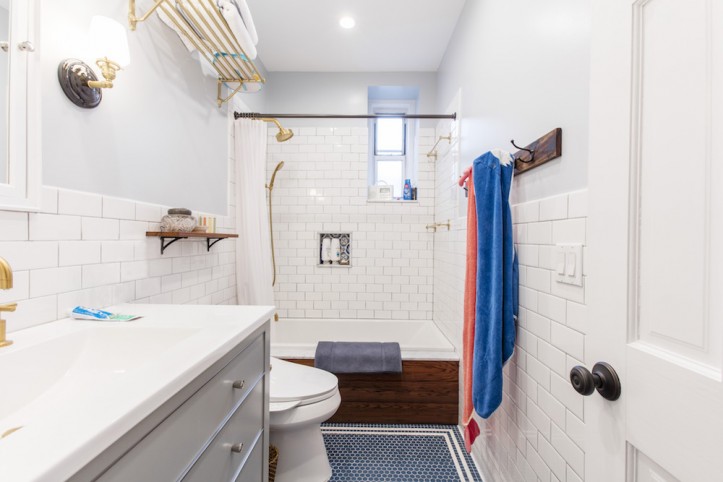
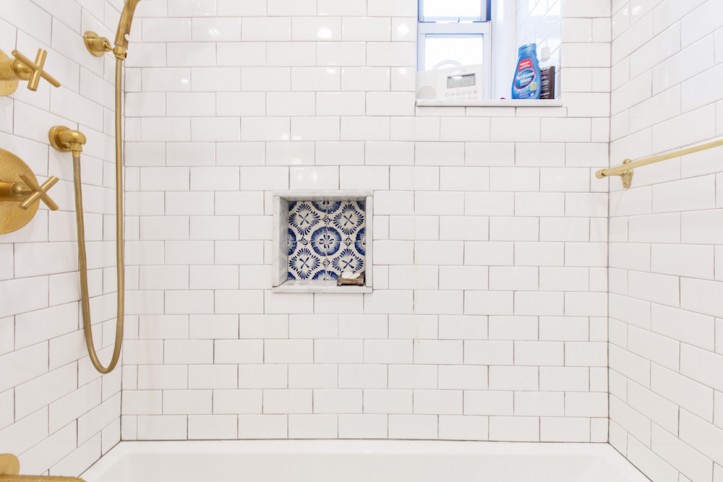
(Above) Second-floor master bath
We even added two more closets that mirror each other in both bedrooms. The master bedroom closet is one of my favorite rooms and elicits the most satisfying reaction from friends now that it’s done. It had been a small room that we converted and had the contractor close off one of the entrances. He finished it as an empty room and we used Ikea Pax cabinets to build our dream spot. My favorite splurge on the top floor was a heated bathroom floor—worth every penny in the winter.
Throughout the house, we did some major upgrades that elevate the whole space: we put up fresh drywall throughout the second floor, refinished the original floors in a dark walnut color, and replaced all the windows in the house.


(Above) Second-floor guest bedroom (with original foyer doors repurposed as the headboard).
While I would not necessarily recommend living in a renovation (so much dust), it did allow us to check on the progress and be more involved in day-to-day decisions that I would have never thought about but are now customized for us…things like outlet and doorknob height. We optimistically thought the renovation would take three months, but we did add on some significant projects that stretched the timeline. Overall, the project took about five months to complete the top two floors with some minor updates in the garden apartment.

(Above) Second-floor hallway
The budget was our major obstacle, but our Sweeten contractor was great at working with us to determine where we could splurge and where we could save. Once our contractor realized we were quite handy, we were able to figure out what we could do ourselves versus what we should leave to the professionals. For example, we chose to take on all the painting, which was a huge undertaking. I’m talking all ceilings, all walls, all trim, and multiple coats! I don’t think we understood what a huge task it was—and that in certain spaces, the contractor was unable to move forward until we completed painting. I’m glad we did it, but it was a grueling several months and I’m pretty sure I gave myself carpal tunnel.

(Above) Garden floor rental apartment
The biggest change in terms of the function of the home was separating the garden floor apartment from the upper two floors. In dividing the two, we were able to gain a coat closet in the apartment and additional storage space for us before the basement level. The ground floor can now be rented as its own standalone unit, while we live on the two floors above. Now that the house is done, I am so thankful we splurged on what we wanted—replacing the windows, skim-coating, and repointing the brick; those are some of my favorite things in the house.
Stay tuned for the story on their new garden rental space. Thanks to Bellamy and Zak for sharing your beautiful and unique home with us!
FOYER RESOURCES: Merola floor tile: Home Depot.
LIVING ROOM RESOURCES: Vega brushed brass blush-mount lamp: CB2.
GROUND FLOOR BATH RESOURCES: Merola hex black floor tile: Home Depot. Jeffrey Court Fresh White wall tile: Home Depot. Devine Color Speckled Dot peel-and-stick wallpaper: Target. Delta Foundations shower fixtures: Home Depot. ENSEN faucet: IKEA. Black towel bar hardware: CB2. The Copper Factory doorknob: Overstock.com. Godmorgon/Odensvik vanity and sink: IKEA. Framed fog-free wall mirror: Home Depot. Hinkley Lighting vanity light from Ainsley Collection: Build.com.
KITCHEN RESOURCES: Merola floor tile: Home Depot. Kitchen cabinets: Custom. Omnia cabinet knobs: Build.com. Drawer pulls: Custom. Quartz countertops: Caesarstone (similar). Jeffrey Court Fresh White backsplash tile: Home Depot. Olde London apron-front farmhouse fireclay sink: Home Depot. Kenmore refrigerator: Sears. Bosch dishwasher: Sears. Whirlpool self-cleaning double electric wall oven: Lowe’s. Kenmore slide-in gas cooktop: Sears.
MASTER BATH RESOURCES: Carrara marble hex mosaic floor tile: MarbleOnline.com. Jeffrey Court Fresh White wall tile: Home Depot. Jeffrey Court Retro Octagon White Dot shower floor tile: Home Depot. Towel bar and toilet paper holder: CB2. Delta Porter shower fixtures: Home Depot. Godmorgon/Odensvik sink and vanity: IKEA. Vanity cabinet fronts: Semihandmade. Hinkley Lighting vanity light from Ainsley Collection: Build.com. Home Decorators Collection framed fog-free wall mirror: Home Depot.
PAINT RESOURCES: Trim paint in Totally Black: Behr. Wall paint in Pure White: Behr Ultra.
—
Remodel the brownstone of your dreams with help from our guide on purchasing and renovating a townhouse.
Refer your renovating friends to Sweeten and you’ll both receive a $250 Visa gift card when they sign a contract with a Sweeten general contractor.
Sweeten handpicks the best general contractors to match each project’s location, budget, and scope, helping until project completion. Follow the blog for renovation ideas and inspiration and when you’re ready to renovate, start your renovation on Sweeten.
The post A Brownstone “Flips” for the Better appeared first on Sweeten Blog.


 Katharine and John’s


 Landscape project by
  Landscaping project by
  Landscape project by Sweeten landscape designer Michelle
 Renovation by


